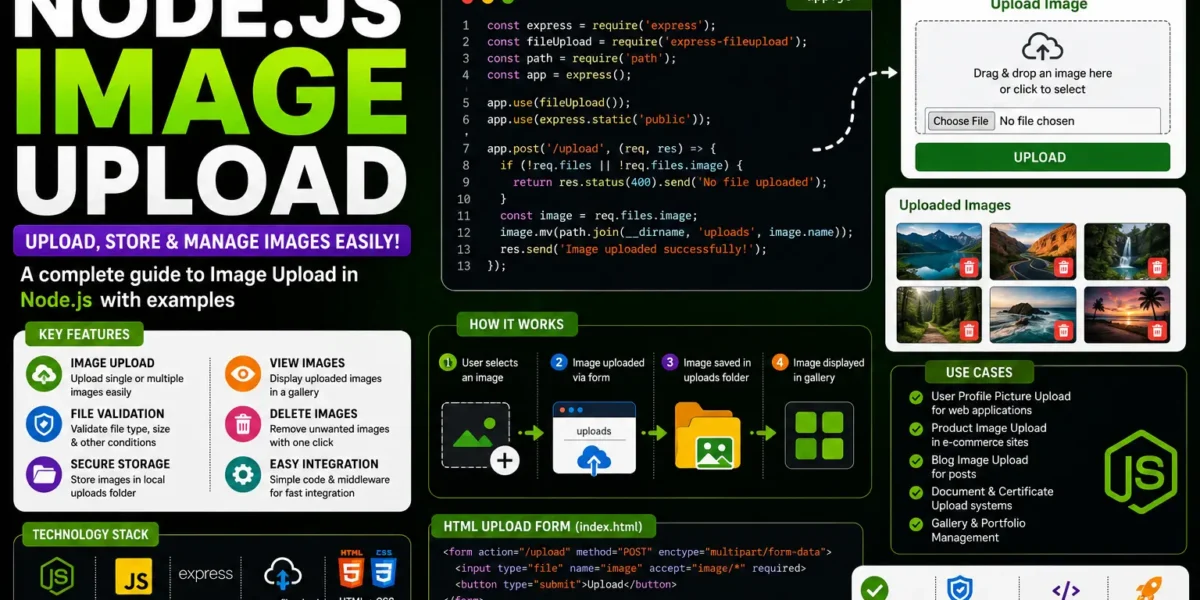
Node.js Image Upload, Processing, and Resizing Using Sharp
Node.js Image Upload, Processing, and Resizing Using Sharp is a practical example of handling image uploads and image processing in a Node.js application. Modern web applications frequently work with images for profile pictures, thumbnails, product images, and other types of visual content.
Handling different image formats efficiently is important because large image files can affect website performance and loading speed. Developers often need to upload images, resize them, compress them, and generate optimized versions without unnecessarily reducing image quality.
In this tutorial, we will explore how to handle image upload, processing, and resizing in Node.js using the Sharp package together with Multer.
Why Image Processing is Important
Images can be large in size, especially when they are uploaded directly from modern cameras and mobile devices. Large files require more storage space and can take longer to transfer to users.
For modern web applications, it is therefore important to optimize images according to their intended use. For example, a product image may need a smaller version for a product listing, while a profile picture may require a fixed size.
The challenge is to maintain a suitable balance between file size, image quality, and website performance.
Node.js provides several tools for handling uploaded images. In this example, Multer is used for handling file uploads, while Sharp is used for image processing and resizing.
Modules Used
The example uses the following important Node.js modules:
- Sharp
- Multer
These modules work together to provide an image upload and processing workflow.
What is the Sharp Module?
Sharp is a fast and powerful Node.js library used for image conversion and manipulation. It supports popular image formats such as JPEG, PNG, WebP, GIF, and AVIF.
Sharp can be used to resize and transform images efficiently. It is particularly useful when applications need to process large images and generate smaller, web-friendly versions.
According to the source article, Sharp uses libvips for image processing and can perform image operations significantly faster than traditional tools such as ImageMagick or GraphicsMagick.
Sharp can also handle color spaces, transparency channels, and ICC profiles while providing operations such as:
- Resizing
- Rotation
- Compositing
- Region extraction
- Gamma correction
- Image format conversion
Sharp is compatible with JavaScript runtimes supporting Node-API v9, including supported Node.js versions, Deno, and Bun.
What is the Multer Module?
Multer is a Node.js middleware used for handling multipart/form-data, which is commonly used when uploading files through web forms.
Multer is built on top of Busboy and provides an efficient way to process form submissions that contain file data.
When a file is uploaded through a form, Multer processes the incoming request and makes information available through the request object.
YT:- DecodeIT
req.body
The req.body property contains the text fields submitted through the form.
req.file
The req.file property contains information about the uploaded file when using a single-file upload.
Multer also provides configuration options for storage engines, upload destinations, and file size or type limitations. This makes it useful for Node.js applications that need to handle file uploads.
When combined with Sharp, Multer can handle the upload process while Sharp performs the required image processing operations.
Node.js Image Upload and Resize Example
The following example demonstrates how to create a simple Node.js application that uploads an image using Multer and then resizes the uploaded image using Sharp.
const express = require('express');
const multer = require('multer');
const sharp = require('sharp');
const path = require('path');
const fs = require('fs');

const app = express();
const port = 3000;

// Set up storage engine for multer
const storage = multer.diskStorage({
  destination: (req, file, cb) => {
    const uploadPath = './uploads';

    if (!fs.existsSync(uploadPath)) {
      fs.mkdirSync(uploadPath);
    }

    cb(null, uploadPath);
  },

  filename: (req, file, cb) => {
    cb(null, Date.now() + path.extname(file.originalname));
  }
});

// Initialize multer with storage settings
const upload = multer({ storage: storage });

// Endpoint to upload image
app.post('/upload', upload.single('image'), (req, res) => {

  if (!req.file) {
    return res.status(400).send('No file uploaded');
  }

  const filePath = req.file.path;

  const resizedFilePath = filePath.replace(
    path.extname(filePath),
    '-resized' + path.extname(filePath)
  );

  // Resize image using Sharp
  sharp(filePath)
    .resize(300, 300)
    .toFile(resizedFilePath, (error, info) => {

      if (error) {
        console.log('Error resizing image:', error);
        return res.status(500).send('Error processing image');
      }

      console.log('Image resized successfully:', info);

      res.send(
        `Image uploaded and resized successfully. Resized image path: ${resizedFilePath}`
      );
    });
});

// Start the server
app.listen(port, () => {
  console.log(`Server running at http://localhost:${port}`);
});
Understanding the Code
The example uses Express, Multer, Sharp, Path, and File System modules to create the image upload and processing application.
1. Import Required Modules
The first part of the code imports the required Node.js packages:
const express = require('express');
const multer = require('multer');
const sharp = require('sharp');
const path = require('path');
const fs = require('fs');
Express is used to create the web server, Multer handles file uploads, Sharp processes the image, Path handles file paths and extensions, and the File System module is used to work with the upload directory.
2. Create the Express Application
const app = express();
const port = 3000;
The Express application is created and the server is configured to run on port 3000.
3. Configure Multer Storage
The example uses multer.diskStorage() to configure where uploaded files should be stored.
const storage = multer.diskStorage({
  destination: (req, file, cb) => {
    const uploadPath = './uploads';

    if (!fs.existsSync(uploadPath)) {
      fs.mkdirSync(uploadPath);
    }

    cb(null, uploadPath);
  }
});
The application checks whether the uploads directory exists. If it does not exist, the directory is created automatically.
4. Generate a Unique File Name
The example uses the current timestamp together with the original file extension to generate a file name:
filename: (req, file, cb) => {
  cb(null, Date.now() + path.extname(file.originalname));
}
This provides a different file name based on the upload time.
5. Initialize Multer
const upload = multer({ storage: storage });The configured storage engine is passed to Multer, creating the upload middleware used by the application.
Creating the Upload Endpoint
The image upload endpoint is created using an Express POST route:
app.post('/upload', upload.single('image'), (req, res) => {
  // Upload processing
});
The upload.single('image') middleware tells Multer to process a single uploaded file whose form field name is image.
Checking the Uploaded File
The application checks whether a file was successfully uploaded.
if (!req.file) {
  return res.status(400).send('No file uploaded');
}
If no file is found, the server responds with a 400 status and the message:
No file uploadedGetting the Uploaded File Path
When the file is successfully uploaded, its path can be accessed using:
const filePath = req.file.path;This path is then supplied to Sharp for image processing.
Creating the Resized Image Path
The example creates a new file path for the resized image by adding the -resized suffix before the original file extension.
const resizedFilePath = filePath.replace(
  path.extname(filePath),
  '-resized' + path.extname(filePath)
);
For example, an uploaded image can have a corresponding resized file with a -resized suffix.
Resizing the Image Using Sharp
Sharp processes the uploaded image and resizes it to 300 × 300 pixels.
sharp(filePath)
  .resize(300, 300)
  .toFile(resizedFilePath, (error, info) => {
    // Processing result
  });
The resize() method specifies the required image dimensions, while toFile() saves the processed image to the specified destination.
Handling Image Processing Errors
The application checks whether an error occurred during image processing.
if (error) {
  console.log('Error resizing image:', error);
  return res.status(500).send('Error processing image');
}
If Sharp encounters a processing problem, the server returns a 500 response with an error message.
Successful Image Processing
When the image is successfully resized, the application logs the processing information and sends a response containing the path of the resized image.
res.send(
  `Image uploaded and resized successfully. Resized image path: ${resizedFilePath}`
);
This confirms that the upload and resizing operations were completed successfully.
Starting the Node.js Server
The Express application starts listening on port 3000 using:
app.listen(port, () => {
  console.log(`Server running at http://localhost:${port}`);
});
Once the server is running, the image upload endpoint is available at:
http://localhost:3000/uploadOutput Example
If no image is uploaded, the application returns:
No file uploadedWhen an image is successfully uploaded and processed, the application returns a message confirming that the image was uploaded and resized successfully along with the resized image path.
Complete Workflow
The complete Node.js image upload and resizing process can be summarized in the following steps:
- Express creates the Node.js web server and routing.
- Multer handles the uploaded image.
- The uploaded file is stored inside the
./uploadsdirectory. - Multer generates a unique file name using a timestamp.
- The
/uploadendpoint receives the uploaded image. - Sharp processes the uploaded image.
- The image is resized to 300 × 300 pixels.
- The resized image is saved using the
-resizedsuffix. - The application returns the path of the resized image.
- If an error occurs, an appropriate error message is returned.
More:- UPDATEGADH
This workflow demonstrates how Multer and Sharp can be combined to create an efficient image upload and processing system in Node.js.
Testing the Image Upload
Once the Node.js server is running, the upload functionality can be tested by sending an image to the following endpoint:
http://localhost:3000/uploadThe image can be submitted through an HTML form or an API testing tool such as Postman.
The form field used for the uploaded image should be named:
imageConclusion
Node.js Image Upload, Processing, and Resizing Using Sharp demonstrates a practical way to handle image uploads and image manipulation in a Node.js application.
Multer handles the multipart/form-data upload process, while Sharp performs the image processing and resizing operations. In the example, uploaded images are stored in the uploads directory and then resized to 300 × 300 pixels.
This combination provides a straightforward approach for applications that need to upload and optimize images while maintaining a suitable balance between image size, quality, and web performance.
Keywords: node js image upload, nodejs image upload, node js sharp, nodejs sharp, sharp image processing, node js image processing, node js image resize, resize image using node js, node js upload image resize, node js image upload and compress, sharp resize image, multer image upload, node js multer, node js image processing using sharp, image upload processing and resizing using sharp node js image upload processing and resizing using sharp package example
node js image upload processing and resizing using sharp package java
node js image upload processing and resizing using sharp package mac
npm sharp
sharp nodejs
sharp image processing
sharp js
sharp image compression