Hospital Management System Python
The Hospital Management System Python and Django is a web-based application designed to manage important hospital activities digitally. The project provides a centralized platform where hospital operations such as patient registration, appointment scheduling, doctor management, patient management, and billing can be handled through a single system.
This Hospital Management System Project in Python Django is developed using Python, HTML, CSS, and Django. The project uses SQLite3 as its database and follows Django’s MVT architecture for organizing the web application.
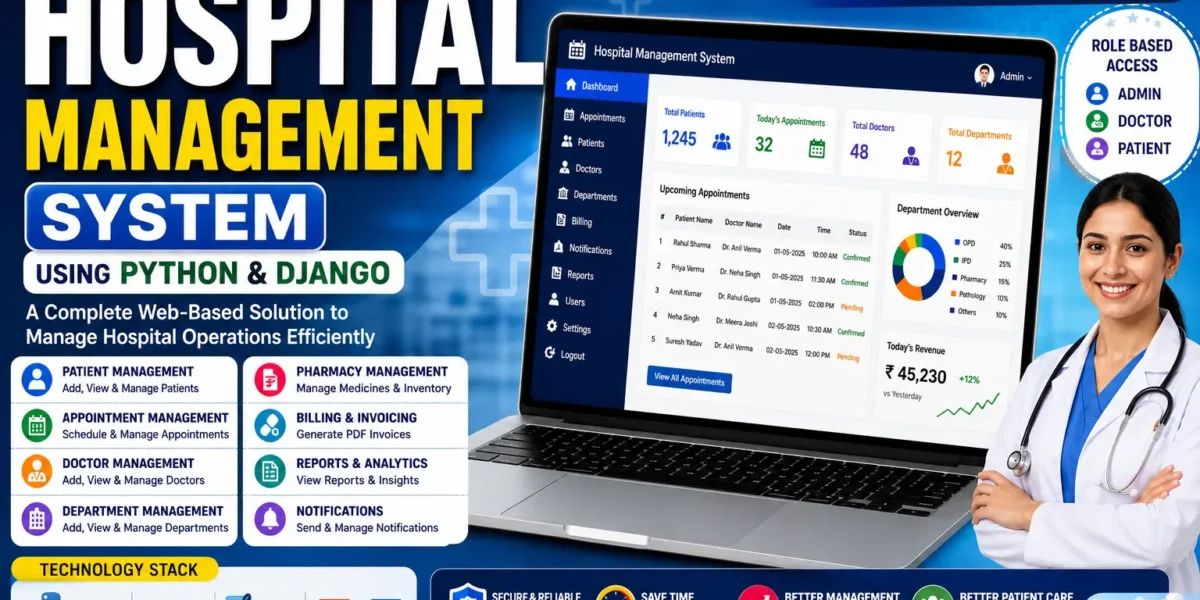
The system is designed around three primary roles: Admin, Doctor, and Patient. Each role has its own responsibilities and access to specific functions. The Admin manages doctors, patients, appointments, and invoices. Doctors can manage their assigned patient information and appointments, while patients can create accounts, book appointments, check appointment status, view doctor details, and download invoices.
Table of Contents
Hospital Management System in Python Django
The Hospital Management System provides a digital environment for managing hospital-related activities. The main purpose of the project is to centralize different hospital operations into one web-based application.
Hospital activities such as patient admission, doctor management, appointment scheduling, and billing can be managed through the system. By keeping these activities within one application, the system provides an organized approach to hospital record management.
The application also demonstrates how a multi-role web application can be developed using Django. The three main roles—Admin, Doctor, and Patient—have separate responsibilities within the system.
The Admin has complete control over hospital operations. Doctors can access their assigned patients and manage their appointments, while patients can register, request appointments, view appointment status, and access their invoices.
Project Overview
The Hospital Management System is a web application built with Python and Django. It uses HTML and CSS for the interface and SQLite3 for database management.
The project demonstrates how a healthcare facility can manage its important activities through a web-based application. It also provides examples of authentication, CRUD operations, database management, role-based functionality, and PDF invoice generation.
The system is divided into three primary user roles. The Admin manages the overall hospital operations, the Doctor works with assigned patients and appointments, and the Patient interacts with the system for registration, appointments, doctor information, and invoices.
Project Details
| Details | Description |
|---|---|
| Project Name | Hospital Management System |
| Languages Used | Python, HTML, CSS, Django |
| Database | SQLite3 |
| Type | Web Application |
Admin Features
The Admin is the main management role in the Hospital Management System. The administrator has access to the major hospital management functions, including doctor management, patient management, appointment handling, and invoice generation.
1. Signup and Login
The system provides Signup and Login functionality for the Admin. The administrator can create an account and log in to the system without requiring approval.
After logging in, the Admin can access the hospital management functions available through the application. This provides the administrator with direct access to the management section.
2. Doctor Management
The Doctor Management section allows the Admin to manage doctors within the hospital system.
Doctors can submit applications for employment through the system. The Admin can review these applications and decide whether to approve or reject them.
The administrator can also delete doctor applications when required. This allows the Admin to control which doctors are added to the hospital system.
The doctor management functionality helps keep doctor-related information organized and ensures that doctor applications are handled through the system.
3. Patient Management
The Patient Management section handles patient admission digitally. The Admin can view patients and manage their admission requests through the system.
The administrator can approve or reject patient admission requests. Once the patient’s treatment is completed, the Admin can also discharge the patient from the hospital system.
This provides a centralized way to manage patient admission and discharge activities.
4. Appointment Management
The Appointment Management feature allows the Admin to view appointment requests submitted by patients.
The administrator can book, approve, or reject appointments according to the available functionality. This helps maintain the appointment schedule and organize patient consultations.
By keeping appointment requests within the system, the Admin can access the required appointment information from one place.
5. Invoice Generation
The Invoice Generation feature allows the Admin to generate detailed PDF invoices after a patient is discharged.
The invoice contains the different hospital charges associated with the patient’s treatment. It automatically includes medicine costs, room charges, doctor fees, and other expenses.
The generated invoice can also be downloaded in PDF format, providing a digital billing record for the completed treatment.
Doctor Features
The Doctor role provides doctors with access to patient and appointment information related to their work in the hospital.
1. Apply for Job
Doctors can use the system to apply for a job. The application is submitted through the system and must be approved by the Admin before the doctor’s account becomes active.
This provides the hospital administrator with control over doctor applications while allowing doctors to submit their employment applications through the web application.
2. View Assigned Patients
The View Assigned Patients feature allows doctors to access information about patients assigned to them.
Doctors can view patient details such as the patient’s name, symptoms, and contact number. This allows doctors to access the information associated with their assigned patients.
The feature provides doctors with a centralized view of their assigned patients within the system.
3. View Discharged Patients
The system maintains information about discharged patients. Doctors can access the list of patients who have completed their treatment and have been discharged from the hospital.
This allows doctors to review the available discharged patient information and keep track of completed treatments.
4. Manage Appointments
The Manage Appointments feature allows doctors to view appointments booked by the Admin.
After a consultation has been completed, doctors can delete the appointment from their available appointment list. This helps keep the appointment information organized.
Patient Features
The Patient role provides patients with access to account creation, doctor information, appointments, appointment status, and invoices.
1. Account Creation and Login
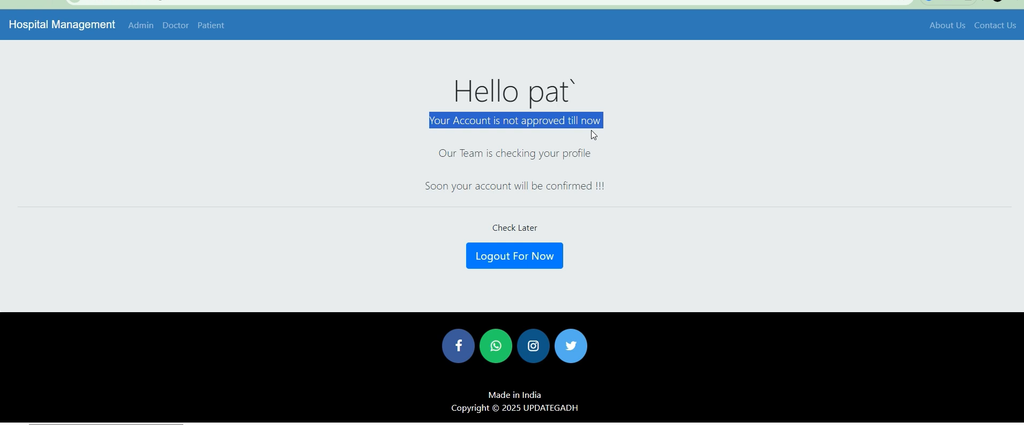
Patients can create an account through the system for hospital admission. However, the patient’s login access becomes active only after approval from the Admin.
This provides an approval-based account process where the administrator reviews the patient’s admission before the patient can access the system.
2. View Doctor Details
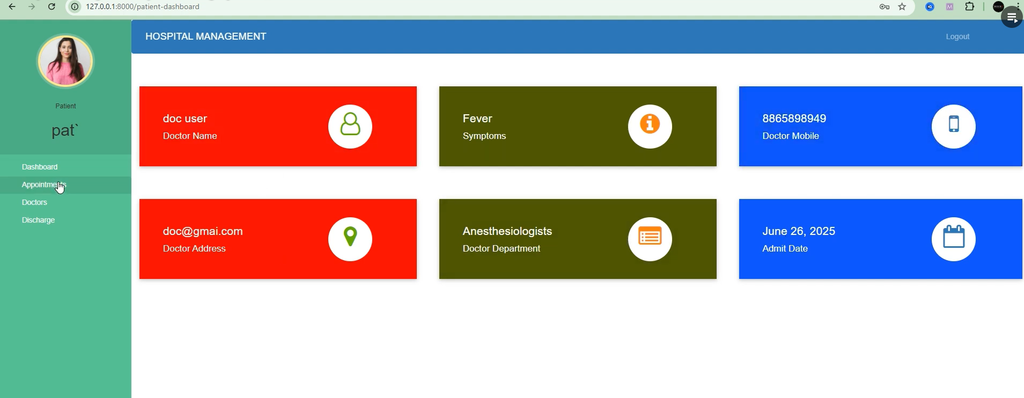
The View Doctor Details feature allows patients to access information about their assigned doctor.
Patients can view details such as the doctor’s specialization, mobile number, and address. This gives patients access to the relevant information about their assigned doctor through the system.
3. Book Appointments
Patients can request appointments with doctors through the online system. The patient selects the required doctor and submits an appointment request.
The appointment request is then subject to Admin approval. This allows the administrator to manage and confirm appointments through the system.
4. Check Appointment Status
The Check Appointment Status feature allows patients to view the current status of their appointment requests.
Patients can check whether their appointment is still pending or has been confirmed. This provides patients with direct access to the status of their appointment requests.
5. View and Download Invoice
After discharge, patients can view and download their invoice in PDF format.
The invoice provides a complete breakdown of the hospital charges associated with the patient’s treatment. This gives patients access to their billing information after discharge.
Hospital Management System Usage
The Hospital Management System is divided into three main roles: Admin, Doctor, and Patient. Each role has specific functions within the application.
Admin Usage
The Admin can sign up and log in without approval. After logging in, the administrator can manage doctors, patients, appointments, and billing.
For doctors, the Admin can view job applications and approve, reject, or delete them. For patients, the Admin can admit patients, assign doctors, approve or reject admission requests, and discharge patients after treatment.
The Admin can also view appointment requests and approve or reject appointments. After a patient is discharged, the Admin can generate and download the patient’s invoice containing the relevant hospital and medical charges.
Doctor Usage
Doctors can apply for employment through the system and wait for Admin approval. Once their account is approved, they can access their assigned patient information.
Doctors can view details such as patient symptoms and contact information. They can also view the list of discharged patients and access their scheduled appointments.
After completing a consultation, doctors can delete the appointment from their appointment list, keeping the schedule organized.
Patient Usage
Patients can create an account for hospital admission. Their account requires Admin approval before login access becomes available.
After gaining access, patients can view their assigned doctor’s specialization, mobile number, and address. They can also request appointments and check whether their appointment is pending or approved.
After discharge, patients can access and download their PDF invoice containing the complete billing details.
Invoice Generation
The Invoice Generation functionality is an important part of the system’s billing process. After a patient is discharged, the Admin can generate a detailed invoice in PDF format.
The invoice automatically calculates the different charges associated with the patient’s treatment. These include medicine costs, room charges, doctor fees, and other expenses.
The generated PDF invoice provides a detailed record of the hospital charges and can be downloaded for record-keeping.
Appointment Management
The system provides appointment functionality for both Admins and patients. Patients can request appointments online, while the Admin can view and approve or reject these appointment requests.
Doctors can view appointments booked by the Admin. Once consultations are completed, doctors can remove the completed appointment from their appointment list.
This provides a structured appointment workflow between patients, administrators, and doctors.
Patient Management
Patient admission is handled digitally through the system. Patients can create accounts and request admission, while the Admin can review and approve or reject these requests.
The Admin can also assign doctors to patients and discharge patients after their treatment has been completed.
This provides a centralized method for maintaining patient admission and discharge information.
Technologies Used
The Hospital Management System is developed using the following technologies:
- Python: Used as the main programming language.
- Django: Used as the web development framework.
- HTML: Used for creating the structure of the web pages.
- CSS: Used for styling and designing the interface.
- SQLite3: Used as the project’s database.
The project uses Django’s MVT architecture to organize the application and provides functionality for authentication, CRUD operations, database management, and PDF generation.
How to Run Hospital Management System in Python Django
The project can be run using Visual Studio Code (VS Code). The installation process requires Python, VS Code, the project dependencies, database migrations, and the Django development server.
Step 1: Install Python
Install Python on your computer. The original project recommends Python 3.7.6.
During installation, make sure that the option to Add Python to PATH is enabled.
Step 2: Install VS Code
Download and install Visual Studio Code. After installing VS Code, install the Python extension to provide better Django and Python support inside the editor.
Step 3: Install Project Requirements
Open the terminal in VS Code and move to the project directory:
cd Hospital Management SystemInstall the dependencies using the requirements file:
pip install -r requirements.txtIf individual packages are required, the project provides the following installation commands:
pip install django==3.0.5
pip install django-widget-tweaks
pip install xhtml2pdf
Step 4: Apply Migrations
After installing the project requirements, create and apply the Django database migrations.
python manage.py makemigrations
python manage.py migrate
These commands create and apply the database migrations required by the project.
Step 5: Create Superuser
The project recommends creating an admin superuser for direct admin access.
python manage.py createsuperuserThis command allows you to create an administrator using a custom username, email, and password.
Step 6: Run the Server
Start the Django development server using:
python manage.py runserverAfter the server starts, open the application in your browser through the local Django server address.
Email Setup for Contact Page
The project also includes an optional email setup for the contact page. If you want to enable the contact functionality, open the hospitalmanagement/settings.py file and update the email credentials.
EMAIL_HOST_USER = 'youremail@gmail.com'
EMAIL_HOST_PASSWORD = 'yourpassword'
EMAIL_RECEIVING_USER = 'youremail@gmail.com'
The original project also provides instructions for configuring the Gmail account used for this contact functionality.
Why This Project is Useful for Students
The Hospital Management System is useful for students who want practical experience with Python and Django web development.
The project demonstrates how to build a full-stack web application using Django and covers real-world functionality such as patient management, appointment scheduling, invoice generation, and doctor management.
It also provides experience with role-based access, database migrations, PDF generation, authentication, and CRUD operations.
The three-role structure gives students an opportunity to understand how different users can have different responsibilities and access within the same web application.
The project can therefore be used as an academic project and as a way to strengthen practical Django development skills.
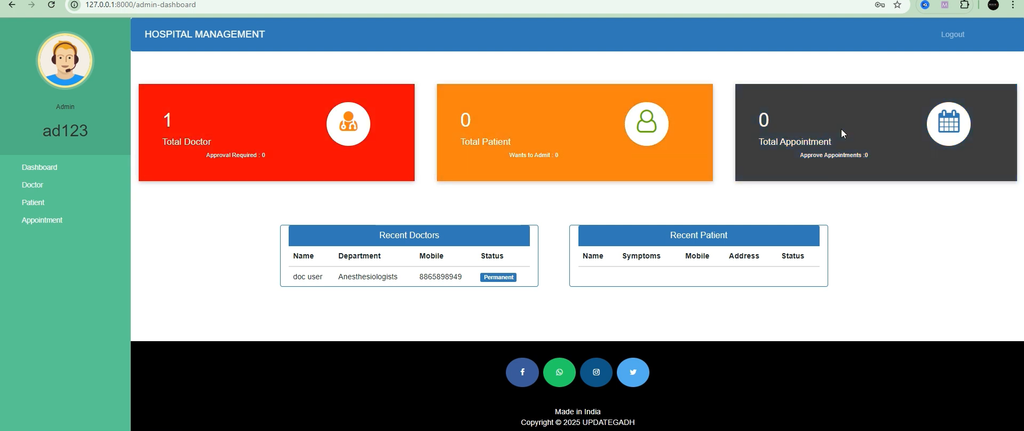
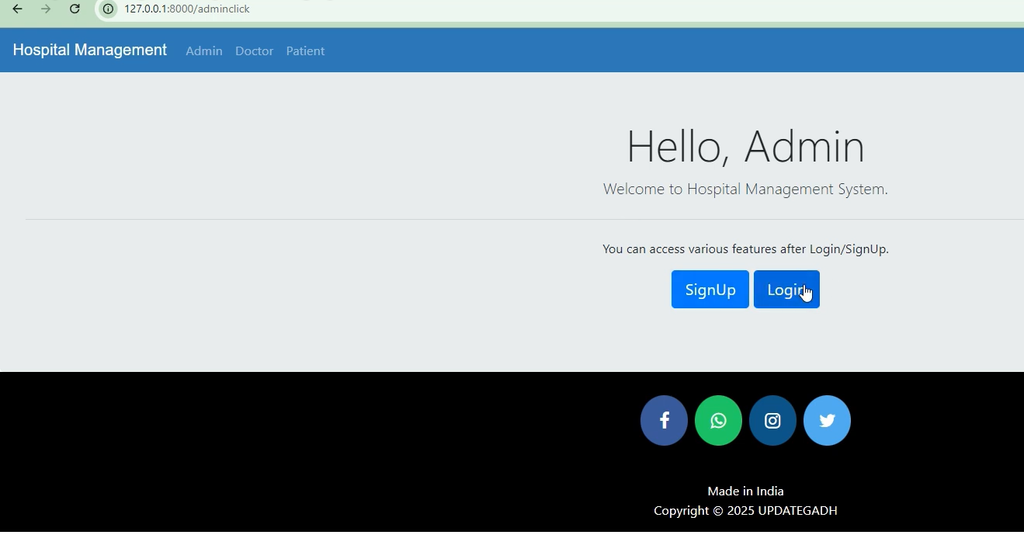
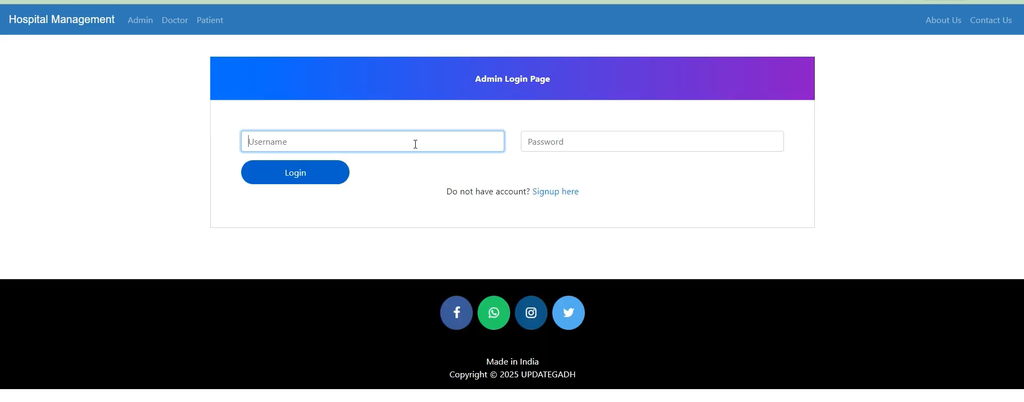
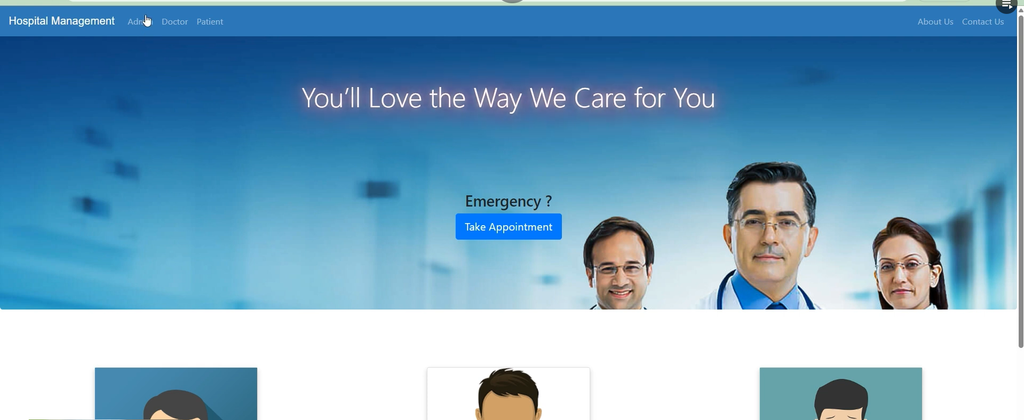
Screenshot:-
How to Download
Get This Project
The complete package is available so you can run, study, and submit it with confidence. It includes:
- Full Source Code
- Project Report
- Synopsis
- PPT Presentation
For any queries or a quick response, reach out on WhatsApp: +91 79834 34684
Important Notes
- Make sure that at least one doctor is added before admitting patients.
- Update passwords when modifying doctor or patient profiles.
- For better security, admin signup can be disabled and the
createsuperusercommand can be used to create administrator accounts.
Hospital Management System Source Code
If you are looking for the Hospital Management System Using Python & Django with Source Code, the complete project source code is available along with the setup information.
The project provides the complete files required to study and run the application, including its Django structure, database configuration, user roles, hospital management features, appointment functionality, and PDF invoice generation.
The project can be useful for your portfolio, college submission, or learning.
Conclusion
The Hospital Management System Using Python and Django provides a centralized web-based platform for managing hospital activities. The system is organized around three primary roles: Admin, Doctor, and Patient.
The Admin can manage doctors, patients, appointments, and invoices. Doctors can apply for jobs, view assigned patients, access discharged patient information, and manage appointments. Patients can create accounts, view doctor details, request appointments, check appointment status, and download PDF invoices after discharge.
The project uses Python, Django, HTML, CSS, and SQLite3. It also demonstrates authentication, CRUD operations, database migrations, role-based functionality, appointment scheduling, patient management, and PDF invoice generation.
With its multi-role structure and practical hospital-related functionality, the project provides students with a useful example of building a complete Django web application.
Keywords:-
hospital management system python project pdf
hospital management system using python with source code
hospital management system using python pdf
hospital management system project python pdf
hospital management system project class 12 python pdf
hospital management system using python project github
hospital management system using python github
hospital management system python class 12
hospital management system python with source code
hospital management system project python pdf
hospital management system python pdf
hospital management system project in python class 12
hospital management system python github
hospital management system python and mysql source code
hospital management system python project report
hospital management system python class 12 python pdf