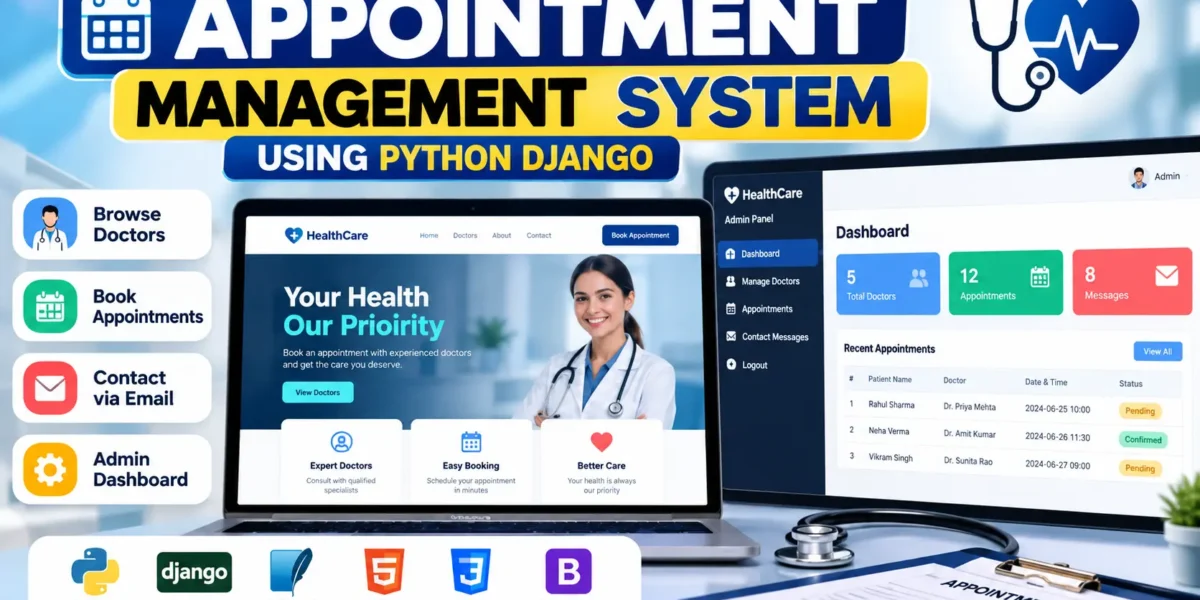
Appointment Management System Using Python Django
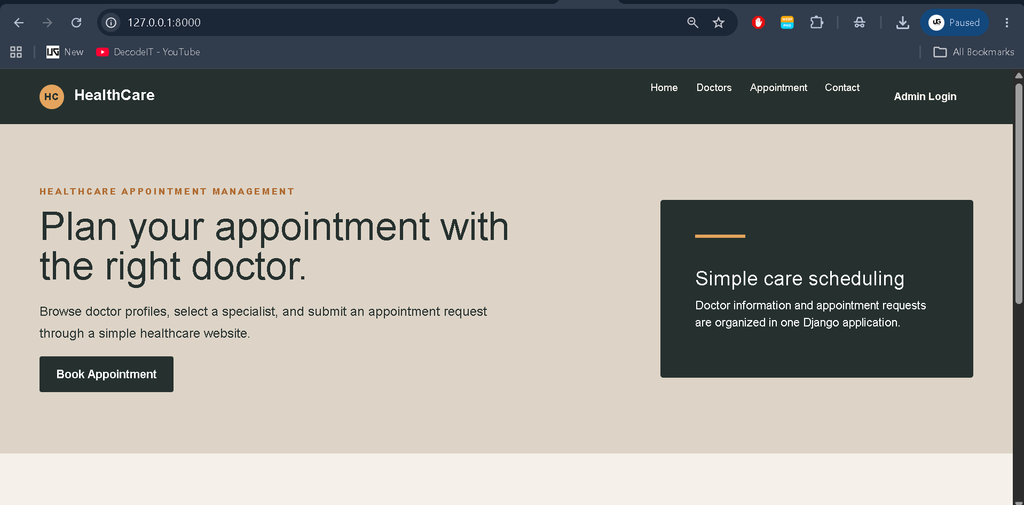
The Appointment Management System is a normal-level healthcare web application developed with the Python Django Framework. It is designed around a clear appointment workflow in which users can browse doctors, read their profiles, submit appointment requests, and contact the healthcare center through email. The project keeps the implementation straightforward so students can understand how a Django application connects web pages, database records, forms, administrator tools, and email communication. Its focus is a practical healthcare use case rather than an advanced or complex software architecture.
Table of Contents
Complete Advance AI Topics: Click Here
Real Time Projects on YouTube:- DecodeIT
Project Overview
| Parameter | Description |
|---|---|
| Project Name | Appointment Management System (HealthCare) |
| Languages Used | Python, HTML, CSS, Bootstrap |
| Database | SQLite3 |
| Type | Web Application |
Introduction
The HealthCare Appointment Management System provides a simple digital process for arranging appointments in a hospital or clinic. The application is built with Django and allows visitors to view available doctors, open individual profiles, and submit the information needed for an appointment request. A contact page is also included so users can send an inquiry to the healthcare team through the configured email service. Appointment information is stored in the SQLite3 database and can be managed through Django’s administration interface.
For students, the project demonstrates several important parts of Django development in one application. The workflow shows how URLs direct requests, how views process those requests, how models represent database information, and how templates present that information in the browser. It also demonstrates form handling and SMTP-based email communication. Because these parts are connected through one practical project, students can follow the movement of information from a web form to the Django backend and database.
Available Features
Admin Dashboard
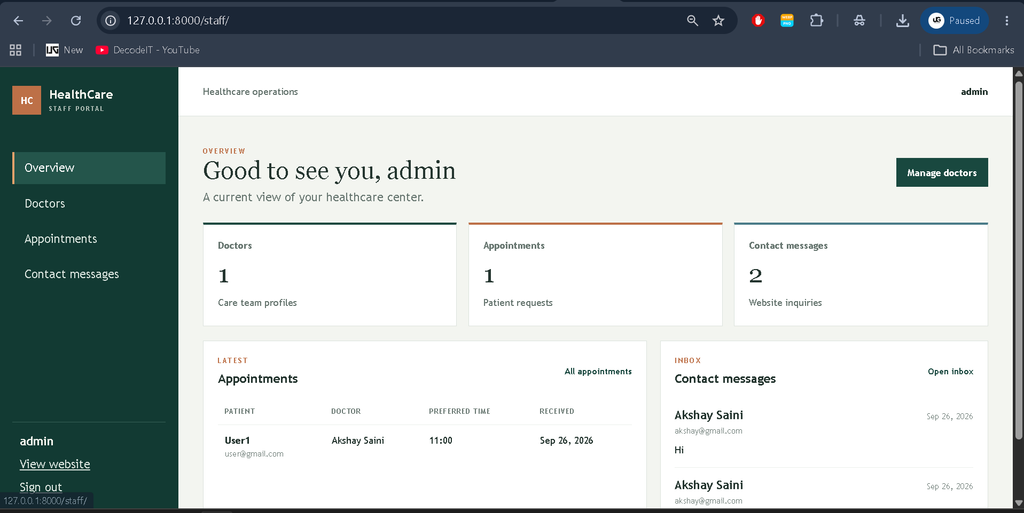
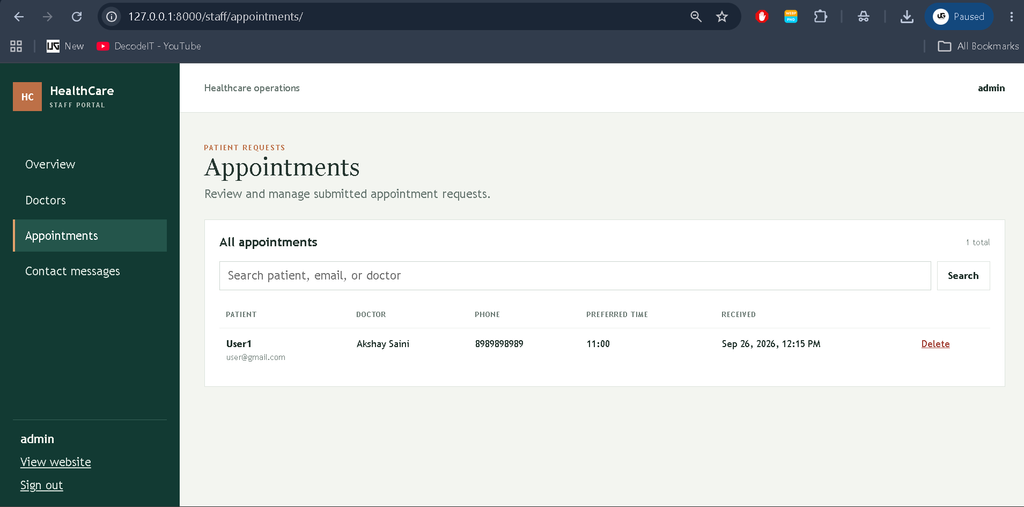
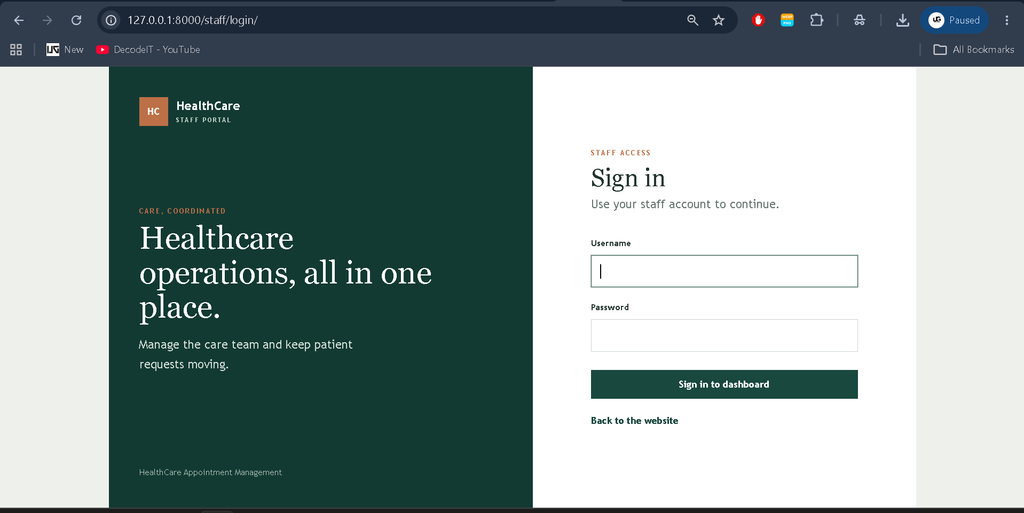
The administrator can securely log in through a dedicated admin login page with a proper custom-designed interface. After logging in, the admin can manage doctor information, view appointment requests, update doctor availability, and handle contact messages submitted by users. The admin dashboard provides a clear and organized interface for managing the main healthcare activities of the system without relying on Django’s default admin panel.
Doctor Management
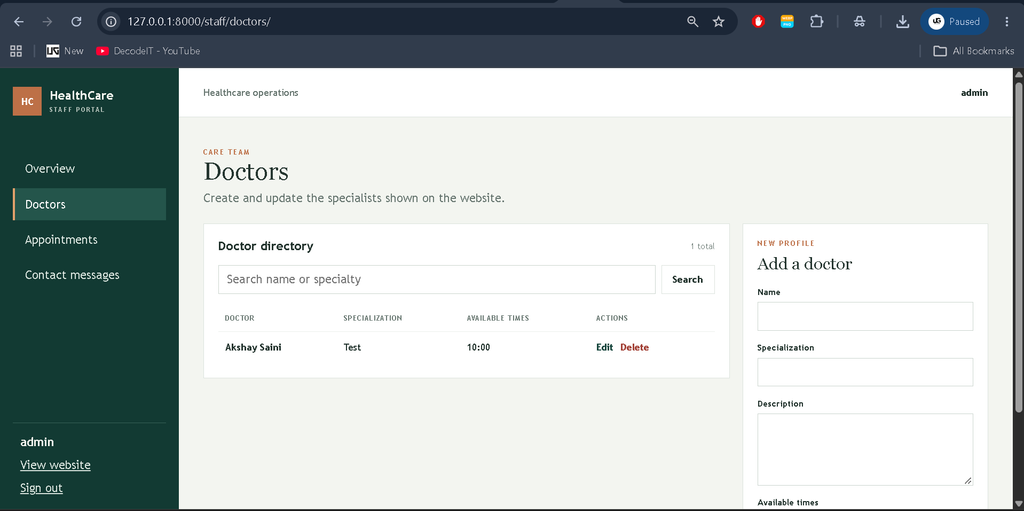
Doctor records contain the information needed for the public doctor directory. An administrator can add new doctors, update existing information, or remove records when required. Each profile stores the doctor’s name, specialization, description, and available times. These details are then displayed on the website for visitors.
Appointment Booking
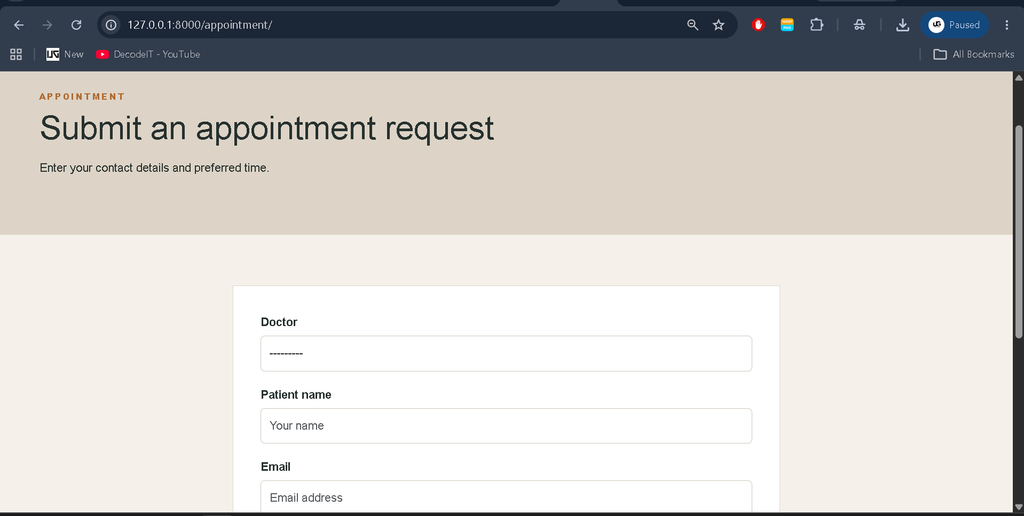
Users can select a doctor and submit an appointment request through the appointment form. The form collects the patient’s name, email address, phone number, selected doctor, and preferred time. After successful submission, the appointment is saved in the database so the administrator can review it from the admin dashboard.
Doctor Profile View
The doctor directory provides a separate profile view for each doctor. Visitors can read the doctor’s specialization, description, and available times before deciding to submit an appointment request. This keeps the selection process connected to the information already maintained by the administrator.
Email Contact Functionality
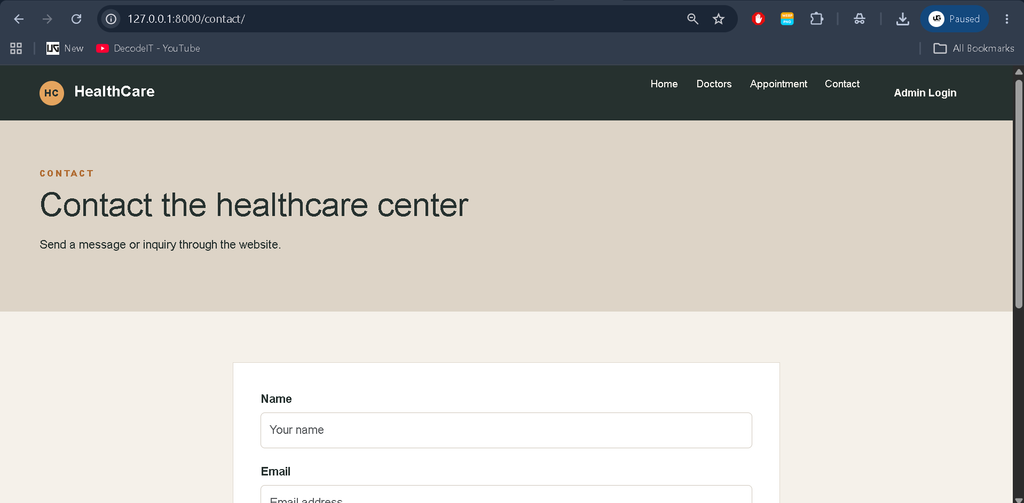
The contact page allows users to send a message or inquiry to the healthcare center. The submitted message is stored in the application and Django’s SMTP email configuration sends the inquiry to the configured receiver address. The project uses the standard SMTP settings supplied in the Django configuration.
Responsive User Interface
The front end uses HTML, CSS, and Bootstrap to create a clean responsive interface. The pages are arranged so that the main navigation, doctor information, appointment form, and contact form remain usable across desktop, tablet, and mobile screen sizes.
Authentication System
Administrator access is handled through Django’s built-in authentication system. A superuser can be created during setup and can then use the Django admin panel to manage the application records. Public visitors can browse doctors and use the appointment and contact forms without needing a patient login.
Download Complete Code
Screenshots
Installation Guide for Visual Studio Code
Step 1: Install Python
Install Python 3 or a newer supported Python version. Open a terminal and confirm the installation with the following command.
python --versionStep 2: Create and Activate a Virtual Environment
Create an isolated environment inside the project folder and activate it. On Windows, use the Windows activation command. On Linux or macOS, use the corresponding shell command.
python -m venv env

# Windows
env\\Scripts\\activate

# Linux/macOS
source env/bin/activate
Step 3: Open the Project in VS Code
Open Visual Studio Code and select the extracted Appointment Management System project folder. Open the integrated terminal from the VS Code interface so the remaining commands run inside the project directory.
Step 4: Install Dependencies
Install Django and the project requirements from the provided requirements file.
pip install -r requirements.txtStep 5: Prepare the Database
Create the migration files and apply them to the SQLite3 database.
python manage.py makemigrations
python manage.py migrate
Step 6: Create the Admin Account
Create a Django superuser so the administrator can open the admin dashboard and manage doctors, appointments, and contact messages.
python manage.py createsuperuserStep 7: Configure Email
Open healthcare/settings.py and replace the placeholder SMTP account values with the email credentials intended for sending contact messages. The supplied configuration uses Gmail SMTP, port 587, and TLS.
EMAIL_BACKEND = 'django.core.mail.backends.smtp.EmailBackend'
EMAIL_HOST = 'smtp.gmail.com'
EMAIL_PORT = 587
EMAIL_USE_TLS = True
EMAIL_HOST_USER = 'your_email@gmail.com'
EMAIL_HOST_PASSWORD = 'your_email_password'
Step 8: Run the Server
Start Django’s development server after the database and email settings are ready.
python manage.py runserverOpen the development server address displayed in the terminal in your browser. The HealthCare Appointment Management System will then be available for use.
Usage
Admin Role
The administrator signs in through Django’s admin panel. After authentication, the administrator can add, update, or remove doctor records, review appointment requests, manage doctor availability information, and handle messages received through the contact form. The built-in Django admin interface provides the management area used for these operations.
User or Patient Role
Visitors can browse the doctor directory without signing in. They can open a doctor profile to review specialization, description, and available times. When they want to request an appointment, they complete the appointment form with their contact information and preferred time. Users can also open the contact page and send an inquiry to the healthcare center.
Project Structure
The application follows Django’s standard Model-View-Template approach. Models define the database structures for doctors, appointments, and contact messages. Views receive browser requests, prepare data, process forms, save records, and render the appropriate templates. Templates contain the HTML pages used for the home page, doctor directory, doctor profile, appointment form, and contact form. URL patterns connect browser addresses with the corresponding views.
Why This Project Is Useful for Students
This project gives students hands-on practice with the essential parts of a Django web application. It covers models and database records, Django ORM usage, form handling, validation, templates, URL routing, administrator management, and SMTP email integration. Students can see how a doctor record created by an administrator becomes information on a public page and how an appointment submitted by a visitor becomes a database record that can later be reviewed from the admin panel.
Keywords:
Appointment Management System DjangoAppointment Management System PythonDoctor Appointment Booking System DjangoDoctor Appointment System in PythonDjango Appointment Booking SystemHealthcare Appointment Management SystemHospital Appointment Management System DjangoDoctor Booking System Python DjangoDjango Healthcare ProjectPython Django Healthcare ProjectAppointment Booking Project in DjangoDoctor Management System DjangoDjango Hospital Management ProjectAppointment Management System Source CodePython Django Project for Students,Appointment Management System Using Python Django,Appointment Management System