Node.js Console Module
The Node.js console module is an essential debugging and output tool for backend developers. Similar to the JavaScript console available in web browsers, it allows you to display messages, errors, warnings, tables, and execution-time information directly in the terminal.
In this tutorial, you will learn the most useful Node.js console methods with practical examples.
Most Common Console Methods
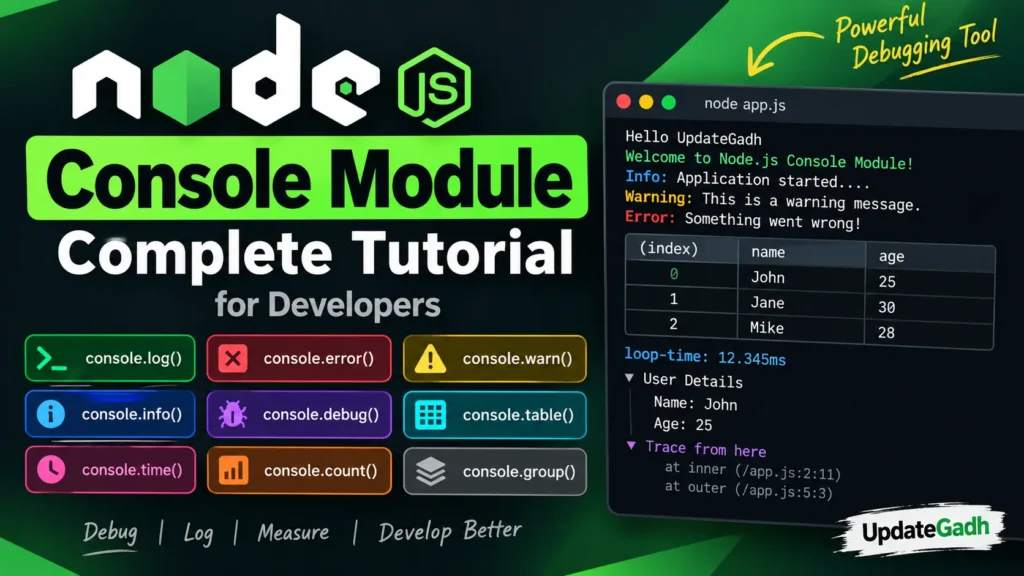
console.log()– Prints standard messages.console.error()– Prints error messages to stderr.console.warn()– Displays warning messages.console.info()– Displays informational messages.console.debug()– Prints debug-level information.
console.log() – Print Standard Output
The console.log() method is the most commonly used console method in Node.js. It is generally used to print text, variables, objects, and other values to the terminal.
// File: console_example1.js
console.log("Hello UpdateGadh");

// Run with:
// node console_example1.js

// Output:
// Hello UpdateGadh
Format Specifiers in console.log()
Node.js supports format specifiers that make it easier to display values in a formatted way. Common specifiers include %s for strings, %d for numbers, %j for JSON data, and %o for objects.
Complete Advance AI Topics: Click Here
SQL Tutorial: Click Here
console.log("Hello %s, your age is %d", "John", 25);
// Output: Hello John, your age is 25

const user = { name: "Jane", role: "Admin" };
console.log("User data: %j", user);
// Output: User data: {"name":"Jane","role":"Admin"}
console.error() – Print Errors
The console.error() method is used to display error messages. Unlike console.log(), its output is written to stderr rather than standard output, which makes it useful when errors need to be captured or redirected separately.
console.error(new Error("Oops! Something went wrong."));

// Output:
// Error: Oops! Something went wrong.
//   at Object. (/path/to/file.js:1:15)
console.warn() – Print Warnings
Use console.warn() when you want to notify developers about a potential issue without treating it as a critical error.
const name = "John";

console.warn(`Warning! Be careful, ${name}!`);

// Output:
// Warning! Be careful, John!
console.table() – Display Data as Tables
The console.table() method is especially useful when inspecting arrays containing objects. It formats the data into an easy-to-read table in the terminal.
const users = [
  { name: "John", age: 25 },
  { name: "Jane", age: 30 },
  { name: "Mike", age: 28 }
];

console.table(users);
console.time() and console.timeEnd() – Measure Execution Time
The console.time() and console.timeEnd() methods can be used together to measure how long a particular section of code takes to execute.
console.time("loop-time");

for (let i = 0; i < 1000000; i++) {
  // some operation
}

console.timeEnd("loop-time");

// Output:
// loop-time: 12.345ms
console.assert() – Conditional Logging
The console.assert() method displays a message when the specified condition evaluates to false. If the condition is true, nothing is printed.
console.assert(1 === 2, "Math is broken!");
// Output: Assertion failed: Math is broken!

console.assert(1 === 1, "This will NOT print");
// No output because the assertion passed.
console.count() – Counter for Repeated Calls
The console.count() method keeps track of how many times a particular label has been called. It can be useful when debugging loops or repeated operations.
for (let i = 0; i < 3; i++) {
  console.count("iteration");
}

// Output:
// iteration: 1
// iteration: 2
// iteration: 3
console.group() and console.groupEnd() – Indented Output
The console.group() and console.groupEnd() methods allow related console messages to be grouped together. This makes terminal output easier to organize and read.
console.group("User Details");

console.log("Name: John");
console.log("Age: 25");

console.groupEnd();
console.trace() – Print Stack Trace
The console.trace() method prints the current stack trace. It is useful when debugging and you need to understand how execution reached a particular point in your code.
function inner() {
  console.trace("Trace from here");
}

function outer() {
  inner();
}

outer();
Best Practices for Node.js Console
- Use
console.error()for errors instead of usingconsole.log()for everything. - Remove unnecessary
console.log()debugging statements before deploying applications to production. - Consider dedicated logging libraries such as Winston or Pino for production applications.
- Use
console.table()when inspecting arrays of objects. - Use
console.time()andconsole.timeEnd()to identify performance bottlenecks.
YT:- DecodeIT
Final Thoughts
The Node.js console module is one of the most useful tools for everyday development and debugging. From simple output with console.log() to performance measurement with console.time(), these methods can make debugging and development much easier.
Once you become comfortable with the console methods, you can use dedicated logging libraries in production applications for features such as log levels, structured logging, and file-based output.
Happy coding!