Python Tkinter Canvas
Python Tkinter includes several widgets for developing desktop graphical applications, and the Canvas widget is one of the most flexible components available. Unlike widgets that mainly display text or collect input, Canvas provides an area where developers can create graphical elements directly inside a Python GUI.
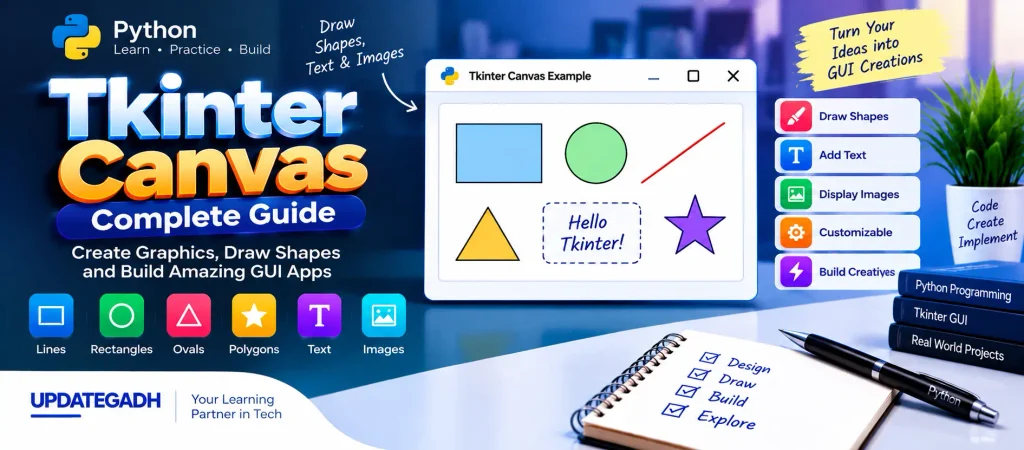
The Canvas can be used to display and arrange different types of visual content. Developers can draw lines, rectangles, circles, arcs, polygons, and text within the canvas area. It can also be used for displaying images. Because of these capabilities, Canvas is useful when creating applications that require custom graphics or visual elements.
Common uses include creating charts, graphs, drawing applications, games, diagrams, and customized interface elements. By combining Canvas with other Tkinter components, developers can create graphical applications with more flexible visual layouts.
In this guide, we will look at the basic Canvas syntax, important configuration options, simple drawing examples, and several commonly used Canvas drawing methods.
Syntax
The general syntax for creating a Canvas widget in Tkinter is:
canvas = Canvas(parent, options)Here, parent identifies the Tkinter window or frame where the Canvas will be placed. The options parameter contains configuration settings that control properties such as the Canvas size, background, border, cursor, and scrolling area.
Once the Canvas has been created, drawing methods can be used to place graphical objects inside it. The position and dimensions of these objects are generally controlled through coordinates.
Common Canvas Options
Tkinter provides several configuration options for controlling how a Canvas appears and behaves. Some commonly used options are listed below.
| Option | Description |
|---|---|
bd | Controls the width of the Canvas border. The default value is 2 pixels. |
bg | Sets the background color displayed inside the Canvas. |
width | Defines the horizontal size of the Canvas. |
height | Specifies the vertical size of the Canvas. |
cursor | Controls the appearance of the mouse pointer when it is positioned over the Canvas. |
relief | Determines the visual style of the Canvas border, such as SUNKEN, RAISED, or GROOVE. |
scrollregion | Defines the coordinate area that can be explored when the Canvas is used with scrolling. |
xscrollcommand | Connects the Canvas to a horizontal scrollbar. |
yscrollcommand | Connects the Canvas to a vertical scrollbar. |
The width and height options are particularly useful when defining the visible drawing area. The bg option can be used to provide a suitable background for graphical content, while relief and bd can be used to change the appearance of the Canvas border.
For larger drawing areas, the scrolling-related options can be useful. The xscrollcommand and yscrollcommand options allow horizontal and vertical scrollbars to work with the Canvas.
Example 1: Creating a Basic Canvas
The first example creates a simple Canvas inside a Tkinter window. No drawing object is added yet; the program simply creates the graphical area that can later be used for drawing.
from tkinter import *

top = Tk()
top.geometry("200x200")

c = Canvas(top, bg="pink", height=200, width=200)
c.pack()

top.mainloop()
How It Works
The program first creates the main Tkinter window and assigns it a size of 200x200. A Canvas object named c is then created with the same height and width.
The bg option gives the Canvas a pink background. Finally, pack() places the Canvas inside the main window, and mainloop() keeps the application running.
Output
When the program is executed, a Tkinter window appears with a rectangular Canvas area having a pink background. This empty Canvas can then be used as a drawing surface for graphical objects.
Example 2: Drawing an Arc on Canvas
The Canvas becomes more useful when drawing methods are applied to it. The following example uses create_arc() to place an arc inside the Canvas.
from tkinter import *

top = Tk()
top.geometry("200x200")

c = Canvas(top, bg="pink", height=200, width=200)
c.create_arc(
    (5, 10, 150, 200),
    start=0,
    extent=150,
    fill="white"
)
c.pack()

top.mainloop()
How It Works
The Canvas is first created in the same way as the previous example. The create_arc() method then creates a curved section using the supplied coordinate area.
The start value determines where the arc begins, while extent controls how much of the arc is drawn. The fill option specifies the color used inside the drawn shape.
Output
The application displays a pink Canvas containing a white arc. The position and size of the arc are determined by the coordinate values provided to create_arc().
More Drawing Methods
Canvas provides several methods for creating graphical objects. Each method is designed for a particular type of visual element.
| Method | Purpose |
|---|---|
create_line(x1, y1, x2, y2) | Creates a straight line between the specified coordinates. |
create_rectangle(x1, y1, x2, y2) | Draws a rectangular shape using the supplied coordinates. |
create_oval(x1, y1, x2, y2) | Creates an oval or circular shape inside the Canvas. |
create_polygon(points) | Creates a polygon using a collection of coordinate points. |
create_text(x, y, text="Hello") | Places text at the specified Canvas coordinates. |
create_image(x, y, image=img) | Places an image at the specified location on the Canvas. |
These methods allow a single Canvas to contain multiple graphical objects. For example, a developer can combine rectangles, ovals, lines, and text to create a customized visual layout.
Quick Multi-Shape Demo
The following example combines several Canvas drawing methods in one application. It creates a rectangle, an oval, a line, and a text element inside the same Canvas.
from tkinter import *

root = Tk()

c = Canvas(root, width=300, height=200, bg="white")

c.create_rectangle(
    10, 10, 100, 80,
    fill="lightblue"
)

c.create_oval(
    120, 10, 200, 80,
    fill="lightgreen"
)

c.create_line(
    0, 100, 300, 100,
    fill="red",
    width=3
)

c.create_text(
    150, 150,
    text="UpdateGadh!",
    font=("Arial", 14)
)

c.pack()

root.mainloop()
Understanding the Multi-Shape Example
The Canvas in this program has a width of 300 pixels and a height of 200 pixels. A rectangle is placed near the upper-left area, followed by an oval toward the upper-middle section.
A horizontal line is then drawn across the Canvas. The line uses a width of 3, making it visually different from the other elements. Finally, the create_text() method places UpdateGadh! near the lower portion of the Canvas.
All these objects exist within the same Canvas, demonstrating how multiple drawing methods can be combined to construct a custom graphical area.
Complete Advance AI Topics: Click Here
SQL Tutorial: Click Here
YT:- DecodeIT
Frequently Asked Questions
1. What is Canvas in Python Tkinter?
Canvas is a Tkinter widget that provides an area for creating graphical elements such as lines, shapes, text, arcs, and images.
2. What is the syntax of the Tkinter Canvas?
The basic syntax is Canvas(parent, options), where the parent identifies the containing window or frame.
3. How do you draw a rectangle on Tkinter Canvas?
The create_rectangle() method can be used with two coordinate pairs to define the position and size of the rectangle.
4. How can text be displayed on a Canvas?
The create_text() method places text at a specified coordinate within the Canvas.
5. Can Tkinter Canvas display images?
Yes. The create_image() method can be used to place an image at a particular Canvas position.
6. What is the use of scrollregion?
The scrollregion option defines the area that can be navigated when the Canvas is configured for scrolling.
Conclusion
The Python Tkinter Canvas widget provides a flexible drawing surface for desktop GUI applications. It can be used to create graphical objects, custom visual components, and different types of interactive interfaces.
With methods such as create_line(), create_rectangle(), create_oval(), create_polygon(), create_text(), and create_image(), developers can combine different elements within one Canvas. Its size, background, border, cursor, and scrolling behavior can also be adjusted through configuration options.
Learning the basic Canvas options and drawing methods provides a useful foundation for creating applications involving charts, games, drawing tools, graphical interfaces, and custom UI elements.
Keywords: Python Tkinter Canvas, python tkinter canvas documentation, Python Tkinter Canvas,Python Tkinter Canvas,python tkinter canvas create_text, python tkinter canvas methods, python tkinter canvas image, python tkinter canvas example, tkinter canvas create rectangle, tkinter canvas size, python tkinter label,Python Tkinter Canvas