Python Tkinter Frame Widget
When building a graphical interface with Python, keeping different widgets properly arranged is important for creating a clean and understandable application. The Tkinter Frame widget provides a simple way to divide an interface into separate sections and manage related widgets together.
A Frame works as a container inside a Tkinter window. Developers can place widgets such as buttons, labels, entry fields, and other controls inside a Frame and then position that group within the main application window. This approach makes the interface easier to organize and provides a useful structure for larger GUI applications.
Frames are especially helpful when an application contains multiple groups of controls. Instead of positioning every widget directly inside the root window, related components can be placed inside separate Frames. This makes the layout more modular and easier to manage.
Understanding the Tkinter Frame
In Tkinter, a Frame is a rectangular container that can hold other widgets. It does not normally perform an action by itself; instead, its main purpose is to provide a dedicated area where other GUI components can be arranged.
For example, a developer can create one Frame for navigation buttons, another for form controls, and another for additional actions. Each section can then be positioned independently using Tkinter geometry managers such as pack(), grid(), or place().
This container-based approach is useful for creating interfaces that are organized into logical sections. It also makes it easier to modify one part of an application without changing the entire layout.
Syntax of Frame Widget
The basic syntax for creating a Tkinter Frame is:
w = Frame(parent, options)Here, parent represents the window or container in which the Frame will be created. The options parameter contains configuration properties that control the appearance and dimensions of the Frame.
After creating a Frame, other Tkinter widgets can use that Frame as their parent. The widgets can then be arranged inside it according to the requirements of the application.
List of Common Frame Options
The Frame widget provides several options that can be used to control its border, dimensions, colors, focus appearance, and mouse pointer.
| SN | Option | Description |
|---|---|---|
| 1 | bd | Specifies the width of the Frame’s border. |
| 2 | bg | Sets the background color of the Frame. |
| 3 | cursor | Controls the mouse pointer style displayed when the pointer is positioned over the Frame. |
| 4 | height | Defines the height of the Frame. |
| 5 | highlightbackground | Specifies the highlight background color used when the Frame is not focused. |
| 6 | highlightcolor | Defines the color of the highlight displayed when the Frame receives focus. |
| 7 | highlightthickness | Controls the thickness of the focus highlight border. |
| 8 | relief | Determines the appearance of the Frame border. The default value is FLAT. |
| 9 | width | Specifies the width of the Frame. |
Example of Tkinter Frame Widget
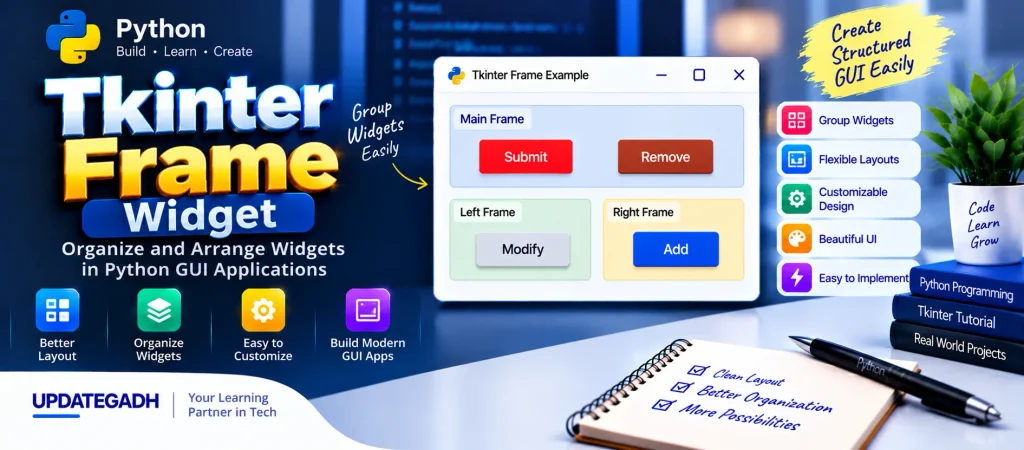
The following example demonstrates how multiple Frames can be used to divide a Tkinter window into different sections. Four buttons are created and placed inside different Frames.
from tkinter import *

top = Tk()
top.geometry("200x150")

frame = Frame(top)
frame.pack()

leftframe = Frame(top)
leftframe.pack(side=LEFT)

rightframe = Frame(top)
rightframe.pack(side=RIGHT)

btn1 = Button(
    frame,
    text="Submit",
    fg="red",
    activebackground="red"
)
btn1.pack(side=LEFT)

btn2 = Button(
    frame,
    text="Remove",
    fg="brown",
    activebackground="brown"
)
btn2.pack(side=RIGHT)

btn3 = Button(
    rightframe,
    text="Add",
    fg="blue",
    activebackground="blue"
)
btn3.pack(side=LEFT)

btn4 = Button(
    leftframe,
    text="Modify",
    fg="black",
    activebackground="white"
)
btn4.pack(side=RIGHT)

top.mainloop()
How the Example Works
The program first creates the main Tkinter window and gives it a size of 200x150. A general Frame is then created and positioned using pack().
Two additional Frames named leftframe and rightframe are created. The side parameter is used with pack() to position these Frames toward the left and right portions of the window.
The buttons are then assigned to different Frames. Submit and Remove are placed inside the main Frame, while Add belongs to the right Frame and Modify belongs to the left Frame.
This demonstrates an important advantage of using Frames: widgets can be grouped according to their purpose and then positioned as a section instead of managing every widget independently.
Complete Advance AI Topics: Click Here
SQL Tutorial: Click Here
YT:- DecodeIT
Output
When the program is executed, a Tkinter window appears containing four buttons. The buttons are arranged through their respective Frames, creating separate left, right, and central areas within the application.
The exact position of each button depends on the Frame it belongs to and the side value supplied to the pack() method. This example shows how Frames can be used to organize controls into different sections of a GUI.
Frequently Asked Questions
1. What is a Frame widget in Tkinter?
A Frame is a container widget used to group and organize other Tkinter widgets inside a Python GUI application.
2. What is the syntax of the Tkinter Frame?
The basic syntax is Frame(parent, options), where the parent identifies the container and the options control the Frame’s properties.
3. Why are Frames used in Tkinter?
Frames are used to divide a GUI into logical sections and to keep related widgets together. This makes complex interfaces easier to organize and maintain.
4. Can a Frame contain other widgets?
Yes. Widgets such as Buttons, Labels, Entry fields, and other Tkinter components can be created with a Frame as their parent.
5. Which geometry managers can be used with Frames?
A Frame can be positioned using Tkinter geometry managers such as pack(), grid(), and place().
6. How can I change the background of a Frame?
The bg option can be used to specify the background color of a Frame.
7. How can I set the size of a Frame?
The width and height options can be used to define the dimensions of a Frame.
Conclusion
The Python Tkinter Frame widget is an important component for organizing graphical user interfaces. Instead of placing every widget directly inside the main window, developers can use Frames to create separate sections and group related controls together.
With options such as bg, bd, width, height, relief, and focus-related properties, a Frame can also be customized according to the application’s design. Combining Frames with geometry managers and other Tkinter widgets provides a practical way to create structured and modular interfaces.
Once you understand how Frames work, you can use them as building blocks for larger Python GUI projects and create layouts that are easier to organize, modify, and maintain.
Keywords: Python Tkinter Frame Widget, python tkinter frame widget example, python tkinter frame widget tutorial, python tkinter frame widget download, python tkinter frame widget navbar, explain frame widget in tkinter with an example in python, tkinter frame documentation, Python Tkinter Frame Widget frame grid, Python Tkinter Frame Widget frame options,Python Tkinter Frame Widget,Python Tkinter Frame Widget