How to Install Django
Django is a popular Python web framework used to develop secure, scalable, and feature-rich web applications. It provides a structured development environment where developers can build websites and web applications using Python.
Before starting a Django project, Python and its package manager need to be available on the system. It is also recommended to create a separate virtual environment so that project dependencies remain isolated from other Python applications.
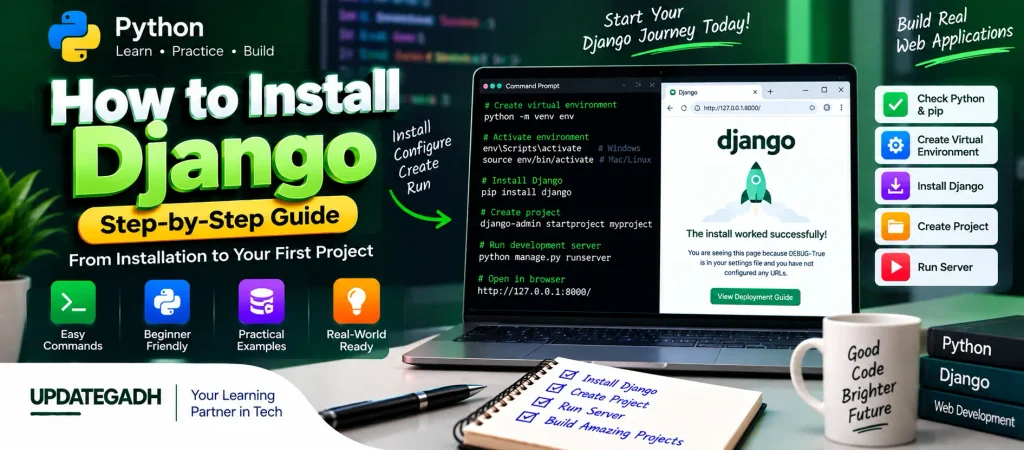
In this guide, you will learn the complete Django installation process, from checking Python and pip to creating a project and launching the development server.
Step 1: Check the Prerequisites
The first requirement for installing Django is having Python installed on your computer. According to this setup guide, Django requires Python 3.6 or later.
To check the Python version available on your system, open Command Prompt or Terminal and run:
python --version
# or
python3 --version
The command will display the currently installed Python version. If Python is not available, install it before continuing with the Django setup.
Step 2: Verify pip
pip is Python’s package installer and is used to download and install Django and other Python packages.
Check whether pip is available by executing:
pip --version
# or
pip3 --version
If pip is correctly configured, the terminal will display its installed version along with related Python environment information.
Step 3: Create a Virtual Environment
A virtual environment creates an isolated Python workspace for a project. This helps keep the packages required by one application separate from dependencies used by other projects.
Create a virtual environment named env with the following command:
python -m venv envActivate on Windows
envScriptsactivateActivate on Mac/Linux
source env/bin/activateOnce activated, packages installed through pip will be associated with the active environment. This provides a cleaner setup for Django development.
Step 4: Install Django
After activating the virtual environment, Django can be installed using pip.
pip install djangoAfter installation finishes, verify that Django is available by checking its version:
django-admin --versionIf the command returns a Django version number, the framework has been installed successfully in the current Python environment.
Step 5: Create Your First Django Project
With Django installed, the next step is to generate a project. Use the django-admin command to create a project named myproject:
django-admin startproject myproject
cd myproject
The startproject command creates the initial Django project structure. The cd command then moves the terminal into the newly created project directory.
From this directory, Django’s manage.py utility can be used to perform common project-related operations.
Step 6: Run the Development Server
After creating the project, you can launch Django’s development server with:
python manage.py runserverDjango will start a local development server. You can then open the following address in a web browser:
http://127.0.0.1:8000/If the project has been created correctly, the Django application will be available through the local server.
Step 7: Install Optional Packages
Django can be extended with additional Python packages depending on the requirements of your application. Some optional packages commonly used with Django projects include:
pip install djangorestframework  # for REST APIs
pip install pillow               # for image fields
pip install django-environ       # for env variables
Django REST Framework can be used when developing REST APIs. Pillow provides image-processing functionality that can be useful for image-related fields. django-environ can help with environment-based configuration.
Step 8: Deactivate the Virtual Environment
When you have finished working on the Django project, you can leave the active virtual environment with the following command:
deactivateAfter running this command, the terminal returns to the normal Python environment outside the virtual environment.
Complete Advance AI Topics: Click Here
SQL Tutorial: Click Here
YT:- DecodeIT
Frequently Asked Questions
1. What is required before installing Django?
Python and pip should be available on the system before beginning the Django installation process.
2. Why should I create a virtual environment for Django?
A virtual environment keeps project dependencies separated, helping prevent package conflicts between different Python projects.
3. Which command installs Django?
Django can be installed with the following command:
pip install django4. How can I check whether Django is installed?
You can verify the installation by running:
django-admin --version5. How do I start a Django project?
The django-admin startproject command is used to generate a new Django project.
6. How do I start the Django development server?
Inside the project directory, execute:
python manage.py runserver7. Can Django be installed on Windows?
Yes. Django can be installed on Windows using Python and pip. After verifying Python and pip, create a virtual environment, activate it, and run:
pip install django8. How do I check the installed Django version?
Use the following command in the terminal:
django-admin --versionIt will display the Django version currently installed in your active Python environment.
9. How do I activate a Django virtual environment on Windows?
For Windows Command Prompt, use:
envScriptsactivateFor PowerShell, use:
.envScriptsActivate10. How do I deactivate a Django virtual environment?
When you finish working on the project, run:
deactivateThis exits the currently active virtual environment.
Conclusion
Installing Django involves a simple sequence of steps. First, verify Python and pip, then create and activate a virtual environment. After that, install Django, confirm the installation, create a project, and start the development server.
Once the local server is running, the basic Django environment is ready for development. From there, you can continue building applications by creating Django apps, views, templates, URLs, models, and other project components.
Using a virtual environment also provides a convenient way to keep Django dependencies organized and separated from other Python projects.
Keywords: How to Install Django, django install windows, django install python 3, install django mac, django pip install, django virtualenv, django setup tutorial, django installation guide