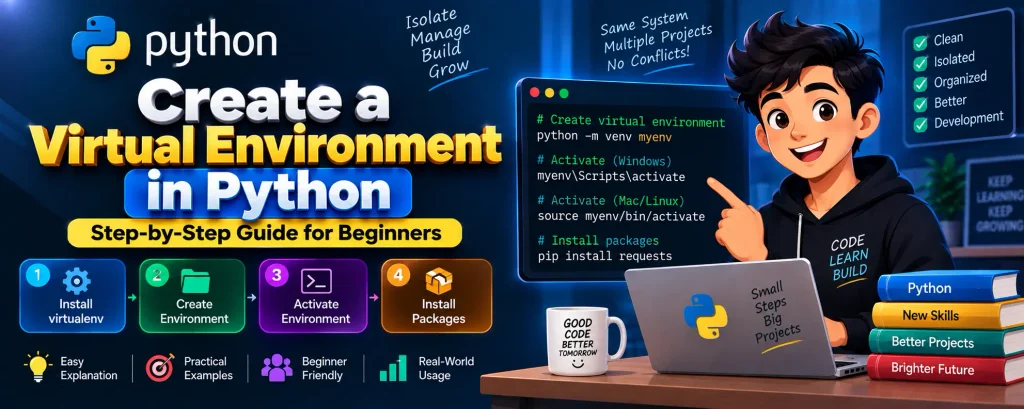
Create a Virtual Environment in Python
When working on Python projects, you may need to install different libraries and packages. These packages can have specific version requirements, and using all of them in one system-wide Python installation can sometimes create dependency conflicts. A virtual environment provides a simple solution to this problem.
A virtual environment creates an isolated workspace for a Python project. Packages installed inside the environment remain separate from packages used by other projects. This makes it easier to manage dependencies and keep projects organized.
For example, one project may require an older version of a package while another project needs a newer version. Instead of installing one version globally and creating conflicts, you can create separate virtual environments for both projects.
In this guide, you will learn how to create a virtual environment in Python, how to activate it on Windows and macOS/Linux, how to install packages inside it, and the basic difference between venv and virtualenv.
Complete Advance AI Topics: Click Here
SQL Tutorial: Click Here
What Is a Virtual Environment in Python?
A virtual environment is an isolated Python workspace created for a specific project. It allows you to install and manage project-specific packages without affecting the system-wide Python installation or other projects.
Using a virtual environment provides several benefits:
- It helps avoid dependency conflicts between projects.
- Different projects can use different package versions.
- Project dependencies remain isolated.
- It keeps the Python development workflow clean and organized.
For example, suppose Application A needs packageX version 1.0, while Application B requires version 2.0. Separate virtual environments allow both applications to use their required versions without interfering with each other.
Step 1: Install virtualenv
virtualenv is a third-party Python package that can be used to create isolated environments. If you want to use this tool, you can install it using pip.
First, open your terminal or command prompt and run:
pip install virtualenvAfter installation, the virtualenv command can be used to create an isolated Python environment.
However, Python 3 also includes a built-in module called venv, so installing virtualenv is not always necessary for basic projects.
Step 2: Create a Virtual Environment
There are two common approaches for creating a virtual environment in Python: using the built-in venv module or using virtualenv.
A. Using the venv Module
The venv module is included with Python from version 3.3 onwards. This makes it a convenient choice for most Python 3 projects.
Open your terminal and run the following command:
python -m venv myenvHere, myenv is the name of the virtual environment. You can replace it with another name according to your project.
For example:
python -m venv project_envThis command creates a directory containing the Python interpreter and the necessary files for the isolated environment.
B. Using virtualenv
If you have installed the virtualenv package, you can create an environment using:
virtualenv myenvThis creates a virtual environment named myenv. The environment can then be activated before installing project dependencies.
Step 3: Activate the Virtual Environment
After creating the environment, you need to activate it before installing or managing packages inside it. The activation command depends on your operating system.
Activate Virtual Environment on Windows
On Windows Command Prompt, use:
myenv\Scripts\activateIf you are using PowerShell, use:
.\myenv\Scripts\Activate.ps1After successful activation, the environment name usually appears in the terminal prompt. This indicates that commands such as python and pip are being used within the virtual environment.
Activate Virtual Environment on macOS or Linux
On macOS and Linux, use:
source myenv/bin/activateOnce activated, packages installed using pip will be installed inside the active environment instead of the system-wide Python installation.
Troubleshooting Windows Activation
When using PowerShell on Windows, you may sometimes see an error indicating that running scripts is disabled on the system. This is related to PowerShell’s execution policy.
If you need to change the execution policy, open PowerShell with the required permissions and use:
Set-ExecutionPolicy -ExecutionPolicy RemoteSignedConfirm the change when prompted. After changing the policy, try activating the virtual environment again.
Execution policies can affect how PowerShell scripts are allowed to run, so this setting should be changed according to your system requirements.
Step 4: Manage Packages Inside the Virtual Environment
After activating your virtual environment, you can install packages using pip. These packages will belong to the active environment.
Example: Installing requests
pip install requestsThis installs the requests library inside the currently active virtual environment. Other Python projects using different environments will not be affected by this installation.
You can install other project dependencies in the same way:
pip install package_nameThis separation is one of the main reasons developers use virtual environments while working on Python projects.
Why Are Virtual Environments Important?
Virtual environments are useful because different Python projects can require different versions of the same package. Installing everything globally can make dependency management difficult.
Example Scenario
Imagine you have two Python applications:
- Application A: Requires
packageXversion1.0. - Application B: Requires
packageXversion2.0.
If both applications use the same global environment, installing one version may cause compatibility problems with the other application.
With virtual environments, you can create separate environments:
- Application A uses its own environment containing
packageX 1.0. - Application B uses another environment containing
packageX 2.0.
This keeps the dependencies of both applications separate.
How to Deactivate a Virtual Environment
When you have finished working on a project, you can leave the active virtual environment using the deactivate command.
deactivateAfter running this command, the terminal returns to the normal system Python environment.
venv vs virtualenv
Both venv and virtualenv can be used to create isolated Python environments, but there are some differences between them.
| Feature | venv | virtualenv |
|---|---|---|
| Availability | Built into Python 3.3+ | Requires installation |
| Installation | No separate installation required | pip install virtualenv |
| Python Support | Python 3 | Supports Python environments with additional features |
| Usage | Simple and suitable for most Python projects | Provides additional environment creation features |
For most Python 3 projects, the built-in venv module is sufficient. The virtualenv package can be useful when you need its additional functionality.
Creating a Virtual Environment in VS Code
Virtual environments are also commonly used when developing Python projects in Visual Studio Code. Open your project folder in VS Code and open the integrated terminal.
Then create an environment using:
python -m venv myenvActivate it according to your operating system. After activation, install the required project packages using pip.
When working in VS Code, make sure the Python interpreter selected for the project is the one from your virtual environment. This allows your code editor and project to use the packages installed in that environment.
Best Practices for Python Virtual Environments
Following a few simple practices can make virtual environment management easier:
- Create a separate environment for each Python project.
- Use meaningful names such as
venv,myenv, orproject_env. - Activate the environment before installing project packages.
- Keep project dependencies isolated from the system Python installation.
- Deactivate the environment when you finish working on the project.
Conclusion
Creating a virtual environment is an important part of managing Python projects. It provides an isolated workspace where project-specific packages and their versions can be installed without affecting other applications.
Python 3 includes the built-in venv module, which is simple and suitable for most projects. You can also use virtualenv when its additional features are useful. Once an environment is created, activate it before installing packages and use deactivate when you are finished.
By using virtual environments, you can keep dependencies organized, reduce compatibility problems, and maintain a cleaner Python development workflow.
Frequently Asked Questions (FAQ)
1. What is a virtual environment in Python?
A virtual environment is an isolated Python workspace that allows a project to use its own packages and dependencies without affecting other projects or the system-wide Python installation.
2. How do I create a virtual environment in Python?
For Python 3, use the built-in venv module:
python -m venv myenv3. How do I activate a virtual environment on Windows?
For Command Prompt, use:
myenv\Scripts\activateFor PowerShell, use:
.\myenv\Scripts\Activate.ps14. How do I activate a virtual environment on macOS or Linux?
Use the following command:
source myenv/bin/activate5. Do I need to install venv using pip?
No. The venv module is included with Python 3.3 and later. You do not normally install it separately using pip.
6. How do I install packages in a virtual environment?
Activate the environment and use pip install:
pip install requests7. How do I deactivate a virtual environment?
Run:
deactivate8. Which is better for Python projects, venv or virtualenv?
For many Python 3 projects, the built-in venv module is sufficient. virtualenv can be considered when additional environment management features are needed.
Related Keywords
activate virtual environment Python, create a virtual environment in Python, create virtual environment Python Windows, create virtual environment Python Windows 11, create virtual environment Python Windows 10, activate virtual environment Python Windows, how to create a virtual environment in Python VS Code, create virtual environment Python Mac, activate virtual environment Python Mac, create a virtual environment in Python, Python venv tutorial, Python virtual environment, Python virtualenv, how to activate venv, Python environment setup, pip install virtualenv,Virtual Environment in Python, Virtual Environment in Python
Download New Real Time Projects: Click Here