Stunning Word Cloud with Python
Data visualization plays a crucial role in understanding and interpreting information. Among the various visualization techniques, a word cloud offers a visually appealing way to represent text data. In this blog, we’ll guide you step-by-step on how to create a word cloud using Python, from reading your data to displaying the final visualization.
Download New Real Time Projects :-Click here
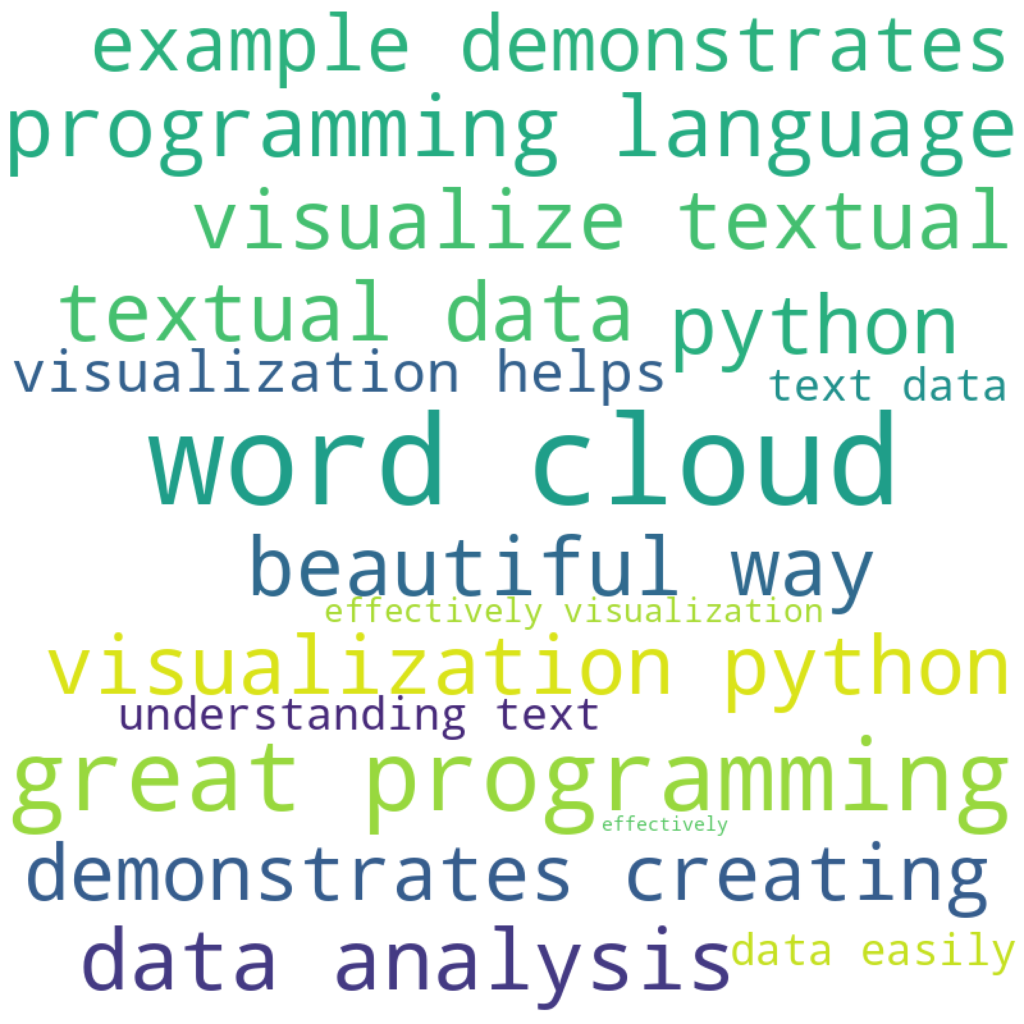
What is a Word Cloud?
A word cloud is a graphical representation of text data where the size of each word reflects its frequency or importance. It’s a great tool to identify the most frequent words in a dataset at a glance.
Steps to Create a Word Cloud
1. Install Required Libraries
To get started, you’ll need the following Python libraries:
pandas: For handling CSV files.matplotlib: For plotting the word cloud.wordcloud: For generating the word cloud itself.
Install them using:
pip install pandas matplotlib wordcloud
2. The Full Code
Here’s the Python script to generate a word cloud:
# Importing required libraries
import pandas as pd
import matplotlib.pyplot as plt
from wordcloud import WordCloud, STOPWORDS

# Step 1: Reading the CSV file
# Replace 'psy.csv' with the path to your CSV file containing the text data
rf = pd.read_csv(r'psy.csv')

# Step 2: Preprocessing the text data
yt_comment_words = " "  # Variable to store all words
stopwords = set(STOPWORDS)  # Set of stopwords to exclude from the word cloud

# Looping through the 'content' column of the DataFrame
for value in rf.content:
    value = str(value)  # Ensuring each entry is a string
    tokens = value.split()  # Splitting the text into individual words (tokens)
    for i in range(len(tokens)):
        tokens[i] = tokens[i].lower()  # Converting each word to lowercase
        yt_comment_words += " ".join(tokens) + " "  # Joining tokens back as a string

# Step 3: Generating the Word Cloud
wordcloud = WordCloud(
    width=800, height=800,  # Dimensions of the word cloud
    background_color='white',  # Background color
    stopwords=stopwords,  # Stopwords to exclude
    min_font_size=10  # Minimum font size
).generate(yt_comment_words)

# Step 4: Visualizing the Word Cloud
plt.figure(figsize=(8, 8), facecolor=None)  # Setting figure size
plt.imshow(wordcloud)  # Displaying the word cloud
plt.axis('off')  # Hiding axes
plt.tight_layout(pad=0)  # Adjusting layout for a cleaner display
plt.show()  # Showing the plot
3. Understanding the Code
Step 1: Reading the Dataset
rf = pd.read_csv(r'psy.csv')
- This line loads the CSV file (
psy.csv) into a pandas DataFrame. Ensure your CSV file contains a column namedcontentwith the text you want to process.
Step 2: Preprocessing the Data
yt_comment_words = " "
stopwords = set(STOPWORDS)
- Text is processed by tokenizing, converting to lowercase, and removing common stopwords like “and,” “the,” etc.
Step 3: Creating the Word Cloud
wordcloud = WordCloud(
    width=800, height=800,
    background_color='white',
    stopwords=stopwords,
    min_font_size=10
).generate(yt_comment_words)
- The
WordCloudclass generates a word cloud based on the processed text.
Step 4: Displaying the Word Cloud
plt.figure(figsize=(8, 8), facecolor=None)
plt.imshow(wordcloud)
plt.axis('off')
plt.show()
- The word cloud is visualized using
matplotlib.
4. Customizing the Word Cloud
Here are some ways to enhance your word cloud:
- Change Background Color: Replace
'white'with any color (e.g.,'black'). - Add a Custom Mask: Use a shape (e.g., a heart or circle) for the word cloud.
- Adjust Font Sizes: Modify
min_font_sizefor better scaling.
PHP PROJECT:- CLICK HERE
word cloud with python python example
word cloud with python generator
word cloud python code
wordcloud python documentation
word cloud with python pandas
wordcloud python colormap
python wordcloud generate_from_frequencies
install wordcloud python
word cloud with python github
word cloud with python examples