Hospital Appointment System in Python
In today’s fast-paced world, managing hospital appointments efficiently is crucial for both patients and healthcare providers. With the advancement in technology, creating a Hospital Appointment System using Python can streamline the process, making it convenient for all parties involved. In this blog post, we’ll walk through the steps to create such a system, highlighting its essential features and providing necessary guidance for implementation.

Introduction
The Hospital Appointment System aims to digitize the process of scheduling and managing appointments between patients and healthcare professionals. This system offers features such as appointment scheduling, cancellation, and modification, thus enhancing the overall efficiency of hospital operations.
Step 1: Making the Project
To begin, create a new Python project directory and set up the necessary files and folders. Utilize Python’s Django framework for building the web application and SQLite for the database.
Step 2: Essential Features
- User Registration: Patients and healthcare providers can register and create accounts.
- Appointment Scheduling: Patients can request appointments with preferred healthcare professionals.
- Appointment Management: Healthcare providers can view, accept, reschedule, or cancel appointments.
- Notification System: Automated email or SMS notifications for appointment reminders.
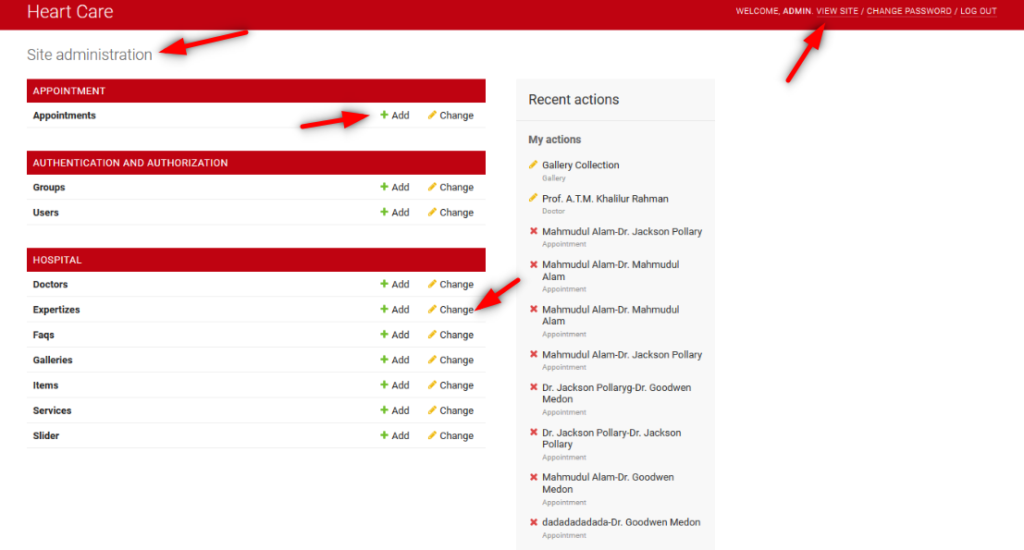
- Admin Dashboard: Administrators can manage users, appointments, and system settings.

Step 3: Required Software and Tools
Ensure you have Python installed on your system along with Flask and SQLite. Additionally, you may need a text editor or IDE for coding, such as Visual Studio Code or PyCharm.
- Python: A popular programming language known for its simplicity and versatility.
- Django or Flask: Web frameworks that simplify the development of complex web applications.
- HTML, CSS, and JavaScript: Front-end technologies for designing the user interface and enhancing user experience.
Step 4: Running the Project
Run the Flask application locally by executing the main Python file. Access the application through a web browser to interact with its features.
To view the requirements, open the requirements.txt file. To install the requirements, use the following command:
pip install -r requirements.txtTo migrate the database open terminal in project directory and type
python manage.py makemigrations
python manage.py migrate
To collect static files
python manage.py collectstaticCreating Superuser
To create superuser open terminal and type
python manage.py createsuperuserFor email sending functionality fill up the information in Your Project setting
EMAIL_BACKEND = 'django.core.mail.backends.smtp.EmailBackend'
EMAIL_HOST = 'smtp.gmail.com'
EMAIL_PORT = 587
EMAIL_USE_TLS = True
EMAIL_HOST_USER = 'your email'
EMAIL_HOST_PASSWORD = 'your email password'
To run the program in local server use the following command
python manage.py runserverStep 5: Project Screenshots
Capture screenshots of the Hospital Appointment System in action, showcasing its various functionalities and user interfaces.


Check more Projects :- https://www.youtube.com/@Decodeit2/playlists
- Download All Free Project :- Click here
Step 7: Conclusion
In conclusion, the Hospital Appointment System in Python offers a convenient solution for managing appointments efficiently in healthcare settings. By leveraging Python’s versatility and Flask’s simplicity, creating such a system becomes accessible to developers. With further enhancements and customization, this system can cater to the specific needs of different healthcare facilities, improving patient experience and optimizing resource utilization.
Tags and SEO
Hospital Appointment System, Python, Flask, Appointment Management, Healthcare Technology, Web Development, Database Management.
| hospital appointment system project in python pdf |
| online hospital appointment system project |
| hospital appointment system software |
| online hospital appointment system |
| hospital appointment system project |
| hospital appointment system |
🎓 Need Complete Final Year Project?
Get Source Code + Report + PPT + Viva Questions (Instant Access)
🛒 Visit UpdateGadh Store →