Vehicle Selling Purchasing Management
Buying and selling vehicles online is very common now. To make this work easier, we can use a Vehicle Selling and Purchasing Management System — a web-based project that helps manage vehicle deals.This system is made using Java Servlet Pages and runs on Tomcat Server. It’s a simple and useful project for handling things like listings, customer info, and transactions.In this guide, we’ll explain the main steps to set up and run the project (without using source code) so you can understand how it works and what parts it includes.
Project Overview
A Vehicle Selling & Purchasing Management System is a web application that allows users to post vehicles for sale, browse available vehicles, and make purchases seamlessly. By building this project using Java Servlet Pages and deploying it on Apache Tomcat, we gain control over customization, scalability, and efficient handling of HTTP requests. Here’s what the project will involve:
- User Registration and Login: Users (buyers, sellers, or admins) register on the platform and access their dashboards.
- Vehicle Listings: Sellers can list vehicles with details like model, year, price, condition, and photos.
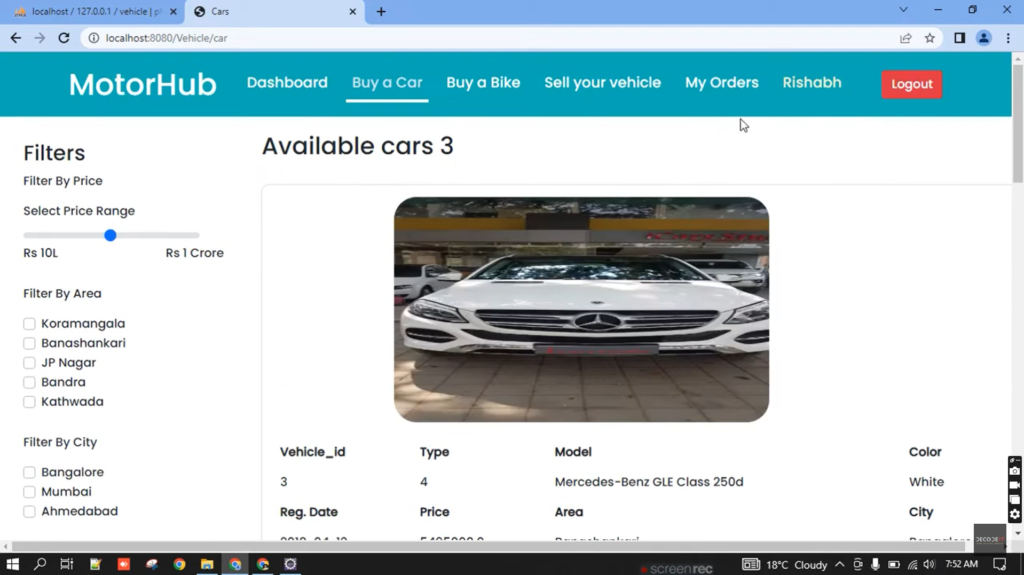
- Search and Filter Options: Buyers can search and filter vehicles based on criteria like make, model, year, or price range.
- Vehicle Details: View complete details of each vehicle.
- Purchasing Workflow: Buyers can proceed with purchasing steps, while sellers track inquiries.
- Admin Management: Admins have a dashboard to manage user listings, inquiries, and transactions.
Requirements
Before we dive into the development steps, ensure you have the following prerequisites:
- Java Development Kit (JDK): Version 8 or later.
- Apache Tomcat Server: Version 9 or later for servlet compatibility.
- Integrated Development Environment (IDE): Eclipse, IntelliJ IDEA, or NetBeans.
- MySQL Database: To store vehicle details, user data, and transaction history.
Download New Real Time Projects :-Click here
Set Up the Project in an IDE
- Create a New Dynamic Web Project: Open your IDE and start a new Dynamic Web Project. This project type is specifically designed to work with Java Servlets and JSP (JavaServer Pages).
- Configure the Apache Tomcat Server: Under the “Server” tab, add Apache Tomcat as the target runtime. Ensure that you link it with your project so you can deploy and test it locally.
- Set Up Folder Structure: Arrange the folders as follows:
- WebContent: For all JSP files, HTML, CSS, and JavaScript files.
- src: For Java Servlets and classes handling the business logic.
- lib: For any third-party libraries you may need.
Design the Database Schema
Designing the database is essential to ensure smooth data flow and management. Here’s a sample database structure:
- Users Table: Store details like user ID, name, email, role (buyer, seller, or admin), and encrypted password.
- Vehicles Table: Include fields for vehicle ID, make, model, year, price, condition, and seller ID.
- Transactions Table: Track transaction history, including buyer ID, vehicle ID, and transaction status.
Create these tables in MySQL, ensuring that foreign keys link users to their respective vehicle listings.
Develop the Core Functionality
- User Registration and Authentication: Use servlets to handle user registration and login functionality.
- RegisterServlet.java: Handle new user registration, validate inputs, and store data in the database.
- LoginServlet.java: Authenticate users based on email and password and redirect them to their respective dashboards.
- Vehicle Listing Management: Create servlets to allow sellers to add, edit, or delete vehicle listings.
- AddVehicleServlet.java: Capture vehicle details from a form and insert them into the database.
- EditVehicleServlet.java: Allow sellers to modify vehicle details.
- DeleteVehicleServlet.java: Provide an option for sellers to remove listings.
- Search and Filter Options: Develop a servlet that retrieves vehicle listings based on search criteria.
- SearchServlet.java: Retrieve data based on parameters passed (like make or model) and display results on a JSP page.
Implement JSP Pages for User Interaction
- HomePage.jsp: Display a welcome page with featured vehicles and search options.
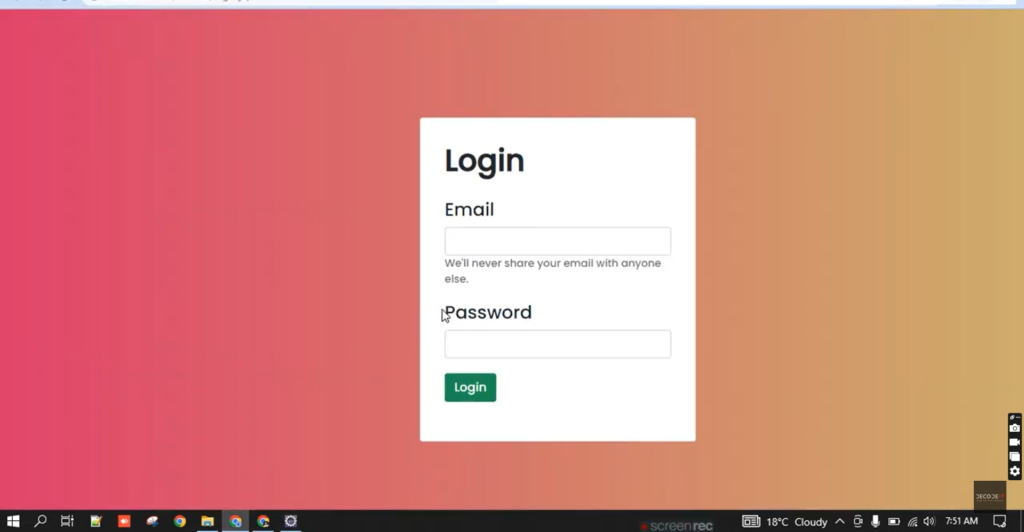
- Login.jsp and Register.jsp: Provide user-friendly forms for authentication and registration.
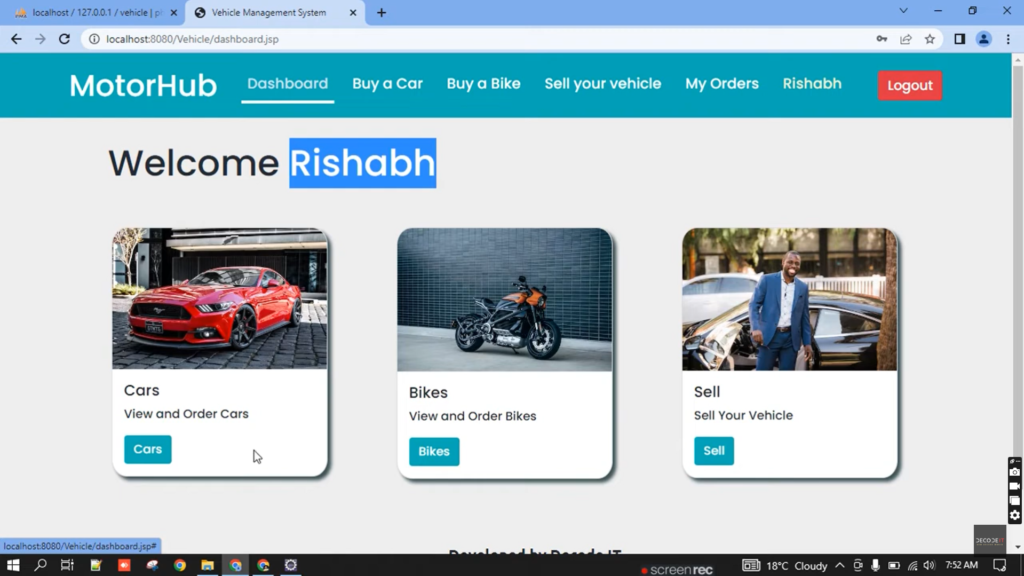
- Dashboard.jsp: Show user-specific information, such as the seller’s listings or a buyer’s purchase history.
- VehicleDetails.jsp: Display detailed information about each vehicle, including images, specifications, and seller contact information.
- SearchResults.jsp: Show filtered vehicle listings based on the search criteria entered by the user.
Add Client-Side Enhancements
Enhance the user interface using HTML, CSS, and JavaScript:
- HTML & CSS: Style the pages for an appealing and responsive design.
- JavaScript: Add interactive elements like image carousels for vehicle photos and confirmation prompts for actions like deleting a listing.
https://updategadh.com/category/php-project
Step 6: Test on Apache Tomcat
- Deploy the Project: Right-click the project in your IDE, select “Run As” > “Run on Server,” and choose Apache Tomcat.
- Test Each Component: Thoroughly test each functionality:
- User Authentication: Verify login and registration.
- Vehicle Listings: Add, view, edit, and delete listings.
- Search and Filter: Test different combinations of search criteria to ensure accurate results.
Deploy the Application on a Remote Server (Optional)
Once the application works locally, consider deploying it on a remote server. This requires:
- Configuring a Cloud Service: Set up a cloud-based Tomcat server on platforms like AWS or DigitalOcean.
- Database Configuration: Set up a remote MySQL instance and update your JDBC connection strings.
- Testing and Optimization: Ensure that all functionalities work as expected in the live environment.


Contact Us to Get the Source Code:
If you need the source code for the Vehicle Selling Purchasing Management Project in Java Servlet Pages | Tomcat | , feel free to reach out through any of the provided contact methods.
- Remotely Setup Project.
- The Full project files
- Database.
- Step-by-step configuration tutorial.
dealer management system software free download
dealer parts operating system for india
ford dms system
vehicle selling purchasing management pdf
vehicle selling purchasing management in india
library management system project in java servlet
java servlet project ideas
simple servlet project in java
Vehicle Selling Purchasing Management
mini project using servlet and jsp github
vehicle tracking system project source code in java
java ee projects with source code
jdbc project source code
employee management system project using jsp servlet
vehicle selling purchasing management project in java servlet pages github
vehicle selling purchasing management project in java servlet pages example
