Enrollment System in PHP
In today’s fast-paced world, educational institutions, businesses, and organizations require efficient systems to manage student or participant enrollment. An enrollment system, particularly a web-based one, simplifies the process, improves data management, and saves time. If you’re looking to develop an enrollment system using PHP, this blog post will provide a complete guide on how to create, configure, and run an enrollment system from a zipped file.
What is an Enrollment System?
An enrollment system is a platform designed to register individuals for courses, programs, or events. It collects essential information such as name, contact details, course preferences, payment information, etc., and stores this data in a secure database. The system typically includes features like:
- Course Registration: Allows students to select and register for courses.
- User Authentication: Ensures that only authorized individuals can access the system.
- Database Management: Stores registration data, payment status, and other details.
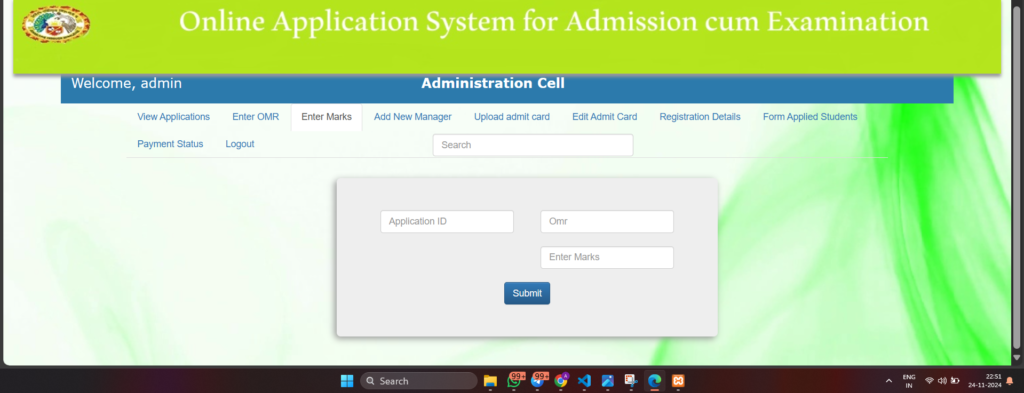
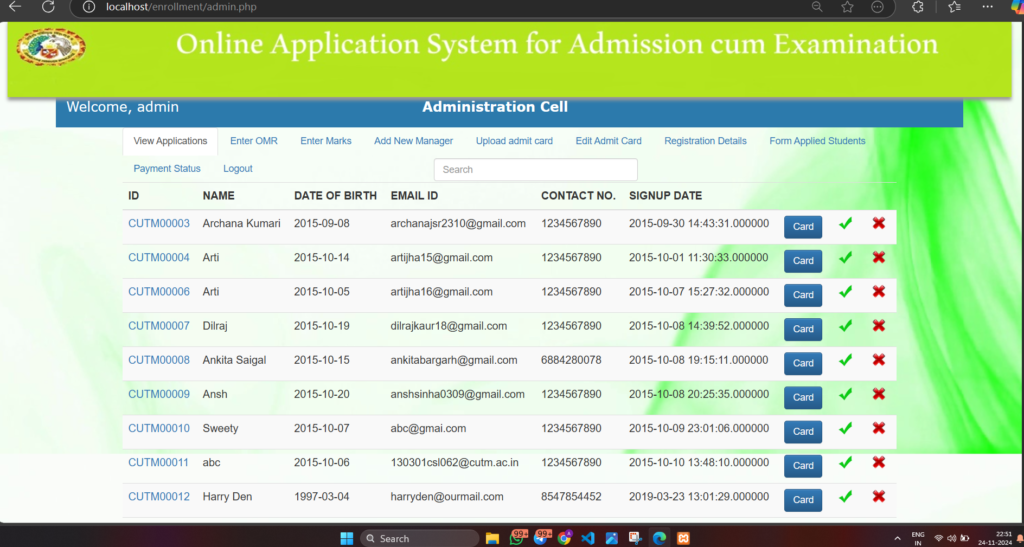
- Admin Dashboard: Enables administrators to monitor enrollments, view reports, and manage courses.
For simplicity and accessibility, PHP (Hypertext Preprocessor) is an ideal language for building such a system. It is an open-source, server-side scripting language that integrates seamlessly with databases like MySQL, making it easy to manage user data.
Features
Before diving into the technical details, let’s quickly go over the core features of an enrollment system in PHP:
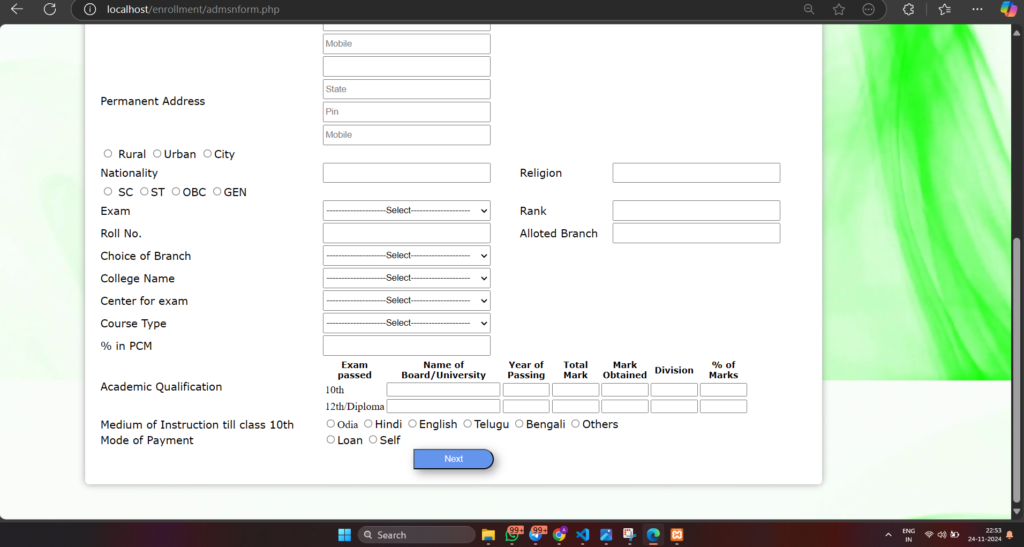
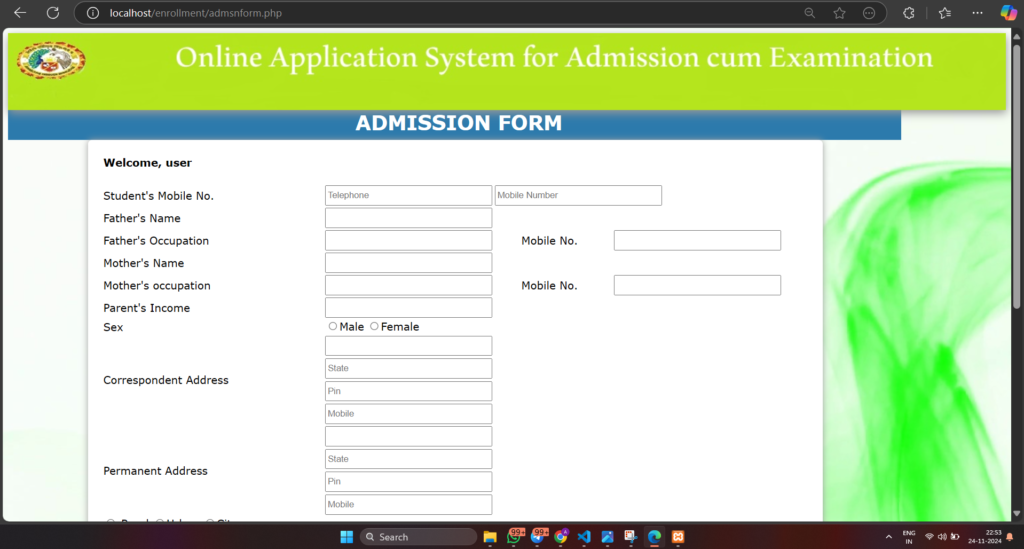
- User Registration and Login: Users can create accounts and log in to view available courses and register for them.
- Course Management: Admins can add, edit, or delete courses.
- Student Enrollment: Students can enroll in courses, and the system tracks their registration details.
- Payment Integration (Optional): If applicable, users can make payments for their courses through integrated payment gateways.
- Admin Dashboard: Admins have access to a dashboard for managing users, viewing student enrollment details, and generating reports.
Step-by-Step Guide
Now that you have a basic understanding of the system, let’s go through the steps to set up and run the PHP enrollment system from a zipped file.
1. Download and Extract the Zip File
The first step is to download the enrollment system zip file. This file contains all the necessary files, including PHP scripts, HTML, CSS, and JavaScript files, as well as SQL files for setting up the database.
- Download the Zip File: Obtain the zip file from the trusted source where the system is hosted.
- Extract the Zip File: After downloading, extract the zip file to a location on your computer or server.
Download New Real Time Projects :-Click here
2. Set Up the Web Server (XAMPP/WAMP)
To run a PHP-based system, you need a local server environment such as XAMPP or WAMP. These tools provide all the necessary components (PHP, MySQL, Apache) to run PHP applications on your machine.
Installing XAMPP:
- Download XAMPP: Go to the official XAMPP website and download the installer for your operating system.
- Install XAMPP: Run the installer and follow the on-screen instructions to install XAMPP on your computer.
Once installed, open XAMPP Control Panel, and start the Apache and MySQL services to launch your server.
3. Set Up the Database
An essential part of the enrollment system is its database, which stores all the enrollment information. Follow these steps to set up the MySQL database for the system:
- Create a Database: Open PHPMyAdmin by navigating to
http://localhost/phpmyadmin/in your browser. - Create a New Database: In PHPMyAdmin, create a new database (e.g.,
enrollment_system). - Import the Database: Inside the zip file, locate the
.sqlfile (e.g.,enrollment_system.sql). This file contains the database schema.- In PHPMyAdmin, select your newly created database and click on the “Import” tab.
- Choose the
.sqlfile from the zip and click “Go” to import the schema into your database.
PHP PROJECT:- CLICK HERE
4. Configure the PHP Files
After setting up the database, you need to configure the PHP files to connect to the database. Open the folder containing the extracted PHP files and find the configuration file (usually named config.php or db.php). Update the following:
- Database Name: Replace the default database name with the one you created in PHPMyAdmin.
- Database Username and Password: If necessary, update the database username and password. The default for most local servers is:
$dbUsername = 'root'; $dbPassword = '';
5. Place the Files in the Server Directory
Now, move the extracted files into the server’s root directory:
- For XAMPP, place the files in
C:\xampp\htdocs\or any folder inside thehtdocsdirectory. - For WAMP, place the files in
C:\wamp64\www\.
6. Access the System Through a Web Browser
Once the files are in place and your local server is running, you can access the system by navigating to:
http://localhost/your-folder-name
Here, your-folder-name is the name of the folder where you placed the PHP files. The enrollment system should now be live, allowing you to test its features.
7. Test the System
After accessing the system through your browser, test the following functionalities:
- Registration: Try creating a user account.
- Login: Log in with the account you just created.
- Course Enrollment: Select a course and enroll.
- Admin Dashboard: If you’re the admin, log in to access the backend features.
Ensure that all functionalities work smoothly, including database operations like registering users, enrolling in courses, and updating records.
8. Optional: Customization
While the system is functional out of the box, you can customize the user interface (UI) and backend logic as per your requirements. You might want to adjust:
- Styling: Modify the CSS files to change the appearance.
- Functionality: Update the PHP files to add or remove specific features like payment integration or report generation.
- Security: Ensure that sensitive information, such as user passwords, is encrypted (e.g., using
password_hash()in PHP).


Download Source Code
DOWNLOAD Enrollment System in PHP WITH SOURCE CODE FOR FREE:
CLICK THE BUTTON BELOW
- online student enrollment system source code
- enrollment system github php
- Enrollment System in PHP
- Enrollment System in PHP
- student registration form in php source code
- casap automated enrollment system
- online enrollment management system
- online admission system in php
- web based enrollment system source code
- pre school enrollment system
- Enrollment System in PHP
- Enrollment System in PHP
