Expense Tracker in Python
Managing personal finances is a critical life skill, and many people struggle to keep track of their daily expenses. Building an Expense Tracker in Python is a great way to automate this process and help users stay on top of their finances. In this post, we’ll walk through the creation of a simple yet effective expense tracker using Python. We’ll cover how it works, its features, and provide the complete source code so that you can build your own tracker from scratch.
Table of Contents
Not only will this project help you hone your Python programming skills, but it will also give you a practical tool to track your spending. Let’s dive in!
Why Build an Expense Tracker in Python?
Python is a versatile language that is easy to pick up for beginners. It offers a simple syntax and has powerful libraries for file handling, data manipulation, and even creating graphical user interfaces (GUIs). By building an expense tracker, you can:
- Practice core Python concepts like loops, functions, and file handling.
- Learn how to store data using CSV files or databases.
- Create a functional tool that can help you (and others) monitor expenses.
This project is suitable for beginners and intermediate Python learners who want to put their skills into action.
Download New Real Time Projects :-Click here
Features
Our Python-based expense tracker will include the following basic features:
- Add Expenses: Users can input their daily expenses, including categories, descriptions, and amounts.
- View Expenses: View a list of all recorded expenses.
- Search by Date: Retrieve expenses based on specific dates.
- Delete Expenses: Users can delete expenses if needed.
- Generate a Total: Display the total amount spent over a specified period.
Step-by-Step Guide
Step 1: Set Up Your Python Environment
Before we start coding, ensure that you have Python installed on your system. You can download it from python.org. Once Python is set up, open a terminal or command prompt.
You can create a new project folder and work inside it:
mkdir expense_tracker
cd expense_tracker
Next, establish a virtual environment and turn it on (not required, but advised):
python -m venv venv
source venv/bin/activate  # On Windows: venv\Scripts\activate
https://updategadh.com/category/php-project
Step 2: Create the Main Script
Let’s start by creating a simple command-line Python script to manage expenses. Create a new Python file called expense_tracker.py:
touch expense_tracker.pyHere’s how the basic structure of the Python script looks:
import csv
from datetime import datetime

# File to store expenses
FILE_NAME = 'expenses.csv'

# Function to add an expense
def add_expense():
    date = input("Enter date (YYYY-MM-DD): ")
    category = input("Enter category (e.g., Food, Rent, Entertainment): ")
    description = input("Enter a description: ")
    amount = float(input("Enter the amount: "))

    with open(FILE_NAME, mode='a', newline='') as file:
        writer = csv.writer(file)
        writer.writerow([date, category, description, amount])

    print(f"Expense of ${amount} for {description} added successfully.")

# Function to view all expenses
def view_expenses():
    try:
        with open(FILE_NAME, mode='r') as file:
            reader = csv.reader(file)
            print("\nDate | Category | Description | Amount")
            print("-----------------------------------------")
            for row in reader:
                print(f"{row[0]} | {row[1]} | {row[2]} | ${row[3]}")
    except FileNotFoundError:
        print("No expenses recorded yet.")

# Function to search expenses by date
def search_expenses():
    search_date = input("Enter the date to search for (YYYY-MM-DD): ")
    try:
        with open(FILE_NAME, mode='r') as file:
            reader = csv.reader(file)
            print("\nDate | Category | Description | Amount")
            print("-----------------------------------------")
            for row in reader:
                if row[0] == search_date:
                    print(f"{row[0]} | {row[1]} | {row[2]} | ${row[3]}")
    except FileNotFoundError:
        print("No expenses recorded yet.")

# Function to display the total expenses
def total_expenses():
    total = 0
    try:
        with open(FILE_NAME, mode='r') as file:
            reader = csv.reader(file)
            for row in reader:
                total += float(row[3])
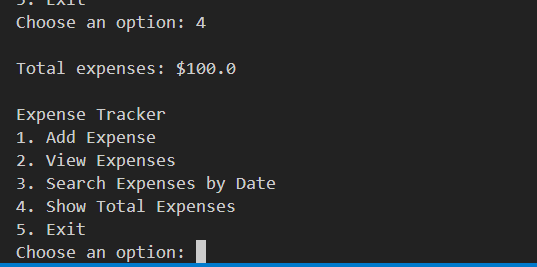
        print(f"\nTotal expenses: ${total}")
    except FileNotFoundError:
        print("No expenses recorded yet.")

# Main menu function
def menu():
    while True:
        print("\nExpense Tracker")
        print("1. Add Expense")
        print("2. View Expenses")
        print("3. Search Expenses by Date")
        print("4. Show Total Expenses")
        print("5. Exit")

        choice = input("Choose an option: ")

        if choice == '1':
            add_expense()
        elif choice == '2':
            view_expenses()
        elif choice == '3':
            search_expenses()
        elif choice == '4':
            total_expenses()
        elif choice == '5':
            print("Exiting the Expense Tracker.")
            break
        else:
            print("Invalid choice, please try again.")

if __name__ == '__main__':
    menu()


Step 3: How the Expense Tracker Works
- CSV File Handling: We are using the CSV module to store expenses in a simple CSV file (
expenses.csv). Each expense includes the date, category, description, and amount. Every time a new expense is added, it is appended to the CSV file. - Adding Expenses: The
add_expense()function takes user input for the date, category, description, and amount. It then stores this data in the CSV file. - Viewing Expenses: The
view_expenses()function reads from the CSV file and prints each row, displaying the date, category, description, and amount of each recorded expense. - Search by Date: The
search_expenses()function allows users to input a specific date to filter and display expenses from that day. - Total Expenses: The
total_expenses()function calculates the sum of all expenses stored in the CSV file. - Main Menu: The
menu()function acts as the main interface, allowing the user to choose between different operations (adding, viewing, searching, and totaling expenses).