Creating a language Translator Application with Android Studio Free Source code
In an increasingly globalized world, language barriers are a significant challenge. This blog post will guide you through creating a language translator application using Android Studio, leveraging the power of machine learning and cloud APIs.
Table of Contents
Introduction
A language translator can convert text or speech from one language to another, facilitating communication between speakers of different languages. This tutorial will show you how to create a simple but powerful translate application using Android Studio, incorporating Google Translate API for accurate and efficient translations.
Prerequisites
Before we begin, ensure you have the following:
- Android Studio: The official IDE for Android development.
- Google Cloud Account: To access the Google Translate API.
- Basic Knowledge of Java/Kotlin: For Android app development.
Step 1: Setting Up Android Studio
- Install Android Studio:
Download ,install Android Studio (official website). - Create a New Project:
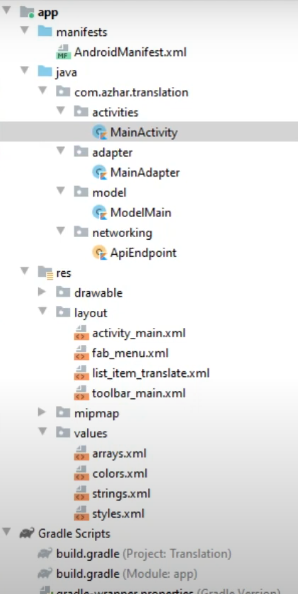
Open Android Studio and start a new project. Select “Empty Activity” and provide the necessary details (project name, package name, etc.).
Step 2: Setting Up Google Translate API
- Enable Google Translate API:
- Go to the Google Cloud Console.
- Create a new project.
- Navigate to the API Library and enable the Google Cloud Translation API.
- Create API Key:
Step 3: Adding Dependencies
Open your build.gradle file (app level) and add the following dependencies:
dependencies {
    implementation 'com.google.cloud:google-cloud-translate:1.94.1'
    implementation 'com.android.volley:volley:1.2.0'
}
Sync your project to ensure all dependencies are correctly added.
Step 4: Designing the User Interface
- Open
activity_main.xml:
- Add an
EditTextfor the input text. - Add a
Spinnerfor selecting the target language. - Add a
Buttonfor triggering the translation. - Add a
TextViewfor displaying the translated text.
<LinearLayout xmlns:android="http://schemas.android.com/apk/res/android"
    android:layout_width="match_parent"
    android:layout_height="match_parent"
    android:orientation="vertical"
    android:padding="16dp">

    <EditText
        android:id="@+id/inputText"
        android:layout_width="match_parent"
        android:layout_height="wrap_content"
        android:hint="Enter text to translate" />

    <Spinner
        android:id="@+id/languageSpinner"
        android:layout_width="match_parent"
        android:layout_height="wrap_content" />

    <Button
        android:id="@+id/translateButton"
        android:layout_width="wrap_content"
        android:layout_height="wrap_content"
        android:text="Translate" />

    <TextView
        android:id="@+id/translatedText"
        android:layout_width="match_parent"
        android:layout_height="wrap_content"
        android:padding="16dp" />
</LinearLayout>
Step 5: Implementing Translation Logic
- Initialize Google Translate API:
In yourMainActivity.java, initialize the Google Translate API using the API key.
import com.android.volley.Request;
import com.android.volley.RequestQueue;
import com.android.volley.Response;
import com.android.volley.VolleyError;
import com.android.volley.toolbox.StringRequest;
import com.android.volley.toolbox.Volley;

import org.json.JSONException;
import org.json.JSONObject;

public class MainActivity extends AppCompatActivity {

    private EditText inputText;
    private Spinner languageSpinner;
    private TextView translatedText;
    private String apiKey = "YOUR_API_KEY";

    @Override
    protected void onCreate(Bundle savedInstanceState) {
        super.onCreate(savedInstanceState);
        setContentView(R.layout.activity_main);

        inputText = findViewById(R.id.inputText);
        languageSpinner = findViewById(R.id.languageSpinner);
        translatedText = findViewById(R.id.translatedText);

        findViewById(R.id.translateButton).setOnClickListener(new View.OnClickListener() {
            @Override
            public void onClick(View v) {
                translateText();
            }
        });

        setupLanguageSpinner();
    }

    private void setupLanguageSpinner() {
        // Populate the spinner with a list of languages
    }

    private void translateText() {
        String text = inputText.getText().toString();
        String targetLanguage = languageSpinner.getSelectedItem().toString();

        String url = "https://translation.googleapis.com/language/translate/v2?key=" + apiKey +
                "&q=" + text + "&target=" + targetLanguage;

        RequestQueue queue = Volley.newRequestQueue(this);
        StringRequest stringRequest = new StringRequest(Request.Method.GET, url,
                new Response.Listener<String>() {
                    @Override
                    public void onResponse(String response) {
                        try {
                            JSONObject jsonObject = new JSONObject(response);
                            String translatedTextStr = jsonObject.getJSONArray("data")
                                    .getJSONObject(0)
                                    .getJSONArray("translations")
                                    .getJSONObject(0)
                                    .getString("translatedText");
                            translatedText.setText(translatedTextStr);
                        } catch (JSONException e) {
                            e.printStackTrace();
                        }
                    }
                }, new Response.ErrorListener() {
            @Override
            public void onErrorResponse(VolleyError error) {
                translatedText.setText("Translation failed!");
            }
        });

        queue.add(stringRequest);
    }
}
Step 6: Testing the Application
- Run the Application:
- Connect your Android device.
- Run the application from Android Studio.
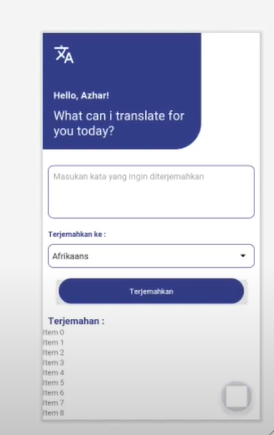
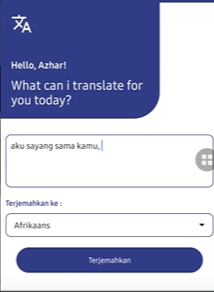
- Enter text, select the target language, and click the translate button to see the translated text.
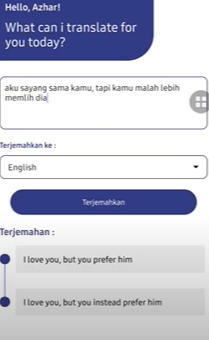
Outputs
Step 7: Download Source Code
👇Project Price Details Click Below 👇
- Complete Python Course : Click here
- Free Notes :- Click here
- New Project :-https://www.youtube.com/@Decodeit2
- How to setup this Project Complete video – Click here
Conclusion
Creating a language translator application with Android Studio is a great way to understand the integration of cloud APIs with mobile applications. This project not only enhances your Android development skills but also gives you hands-on experience with real-time translation services.
Tags and SEO
Tags:
- Android Development
- Translate Application
- Google Translate API
- Mobile App Development
- Android Studio
Related Posts: