


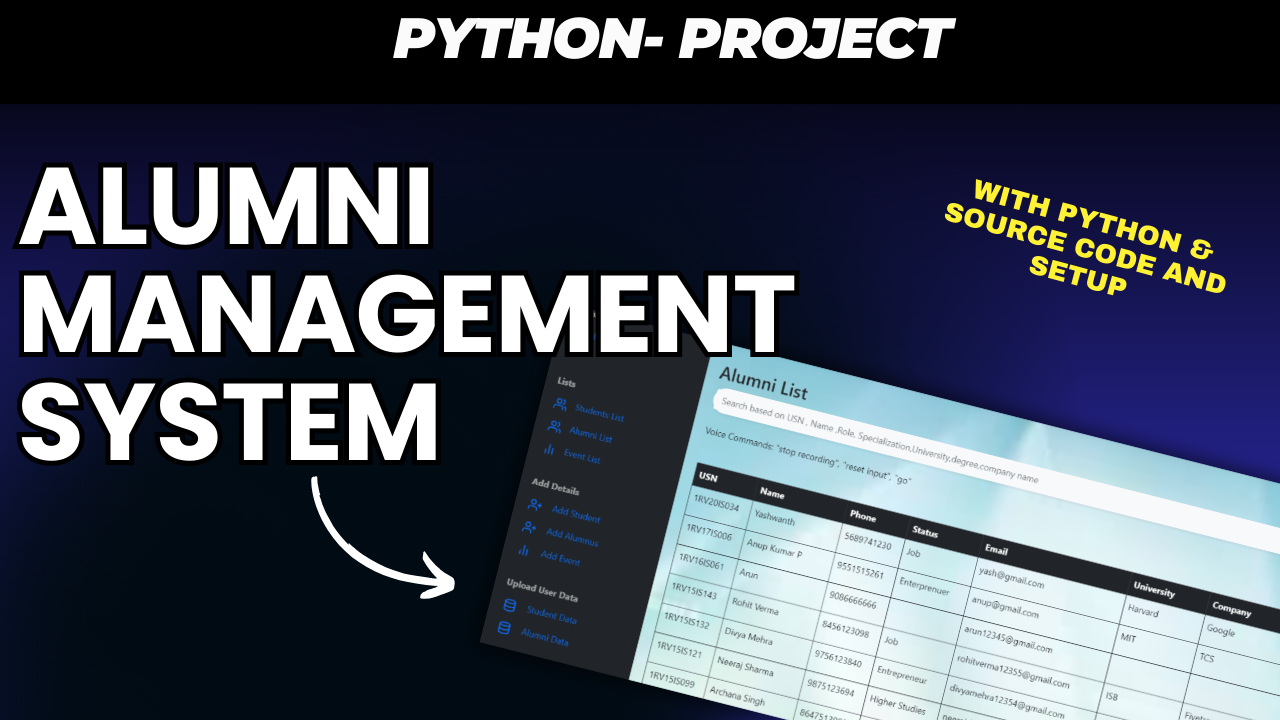
Alumni Web Application Using Python: A Complete Guide
Building an Alumni Web Application Using Python:
Introduction
Connecting alumni with current students is vital for fostering meaningful engagement and providing insights into career success and growth. Alumni Connect is a web application built using Python that allows admins, alumni, and students to interact with one another. It features user role-based access where admins manage profiles and posts, alumni share updates, and students explore posts and find alumni based on their interests. In this guide, we’ll walk you through the essential steps to build this web application.
Table of Contents
Step 1: Making the Project
To begin, create a Python-based web project using a framework like Flask or Django. This application will support three user roles:
- Admin: Manage alumni and student profiles, upload CSV data, and create posts about events.
- Alumni: Update their status, post on the platform, and interact with students and other alumni.
- Students: View and comment on posts and search for alumni based on interests.
Step 2: Essential Features
Here are the core features of Alumni Connect:
- Admin Role:
- Manage profiles for alumni and students.
- Upload data via CSV for bulk updates.
- Create and manage posts for events.
- View analytics on alumni success (e.g., employment rates, higher education status).
- Alumni Role:
- Update higher education and employment details.
- Create posts that can be viewed and commented on by alumni and students.
- Comment on student posts and participate in discussions.
- Student Role:
- Browse and comment on alumni posts.
- Search for alumni by specific interests, education, or industry.
- Complete Python Course : Click here
- Free Notes :- Click here
- New Project :-https://www.youtube.com/@Decodeit2
- Java Projects – Click here
Step 3: Required Software and Tools
Before starting development, ensure you have the following tools installed:
- Python: Version 3.8 or higher.
- Flask or Django: A Python web framework for building the application.
- SQLite or MySQL: For managing user data, posts, and analytics.
- CSV Library: To handle bulk upload of alumni and student data.
- HTML/CSS/JavaScript: For building the frontend of the application.
Step 4: Running the Project
To run the Alumni Connect web application, follow these steps:
Install Dependencies:
pip install -r requirements.txt
Run Migrations: Run migrations to migrate the tables to your database:
python manage.py makemigrations
python manage.py migrate
Run Python Code: Launch the Python shell:
python manage.py shell
Create Admin Group and User: Run the following code in the shell to create a group for admins and a default admin user:
from django.contrib.auth.models import User, Group, Permission
from django.contrib.contenttypes.models import ContentType

admins, _ = Group.objects.get_or_create(name='admins')
admins_ct = ContentType.objects.get(app_label='auth', model='user')
is_admin, _ = Permission.objects.get_or_create(name='is_admin', codename='is_admin', content_type=admins_ct)
admins.permissions.add(is_admin)
is_admin.save()

admin, _ = User.objects.get_or_create(username='admin')
admin.set_password('anteater')
admin.groups.add(admins)
admin.save()
admin.has_perm('auth.is_admin')
Create Groups for Alumni:
alumni, _ = Group.objects.get_or_create(name='alumni')
alumni_ct, _ = ContentType.objects.get_or_create(app_label='auth', model='user')
is_alumnus, _ = Permission.objects.get_or_create(name='is_alumnus', codename='is_alumnus', content_type=alumni_ct)
alumni.permissions.add(is_alumnus)
Create Groups for Students:
students, _ = Group.objects.get_or_create(name='students')
students_ct, _ = ContentType.objects.get_or_create(app_label='auth', model='user')
is_student, _ = Permission.objects.get_or_create(name='is_student', codename='is_student', content_type=students_ct)
students.permissions.add(is_student)
Run the Application: Start the Django development server:
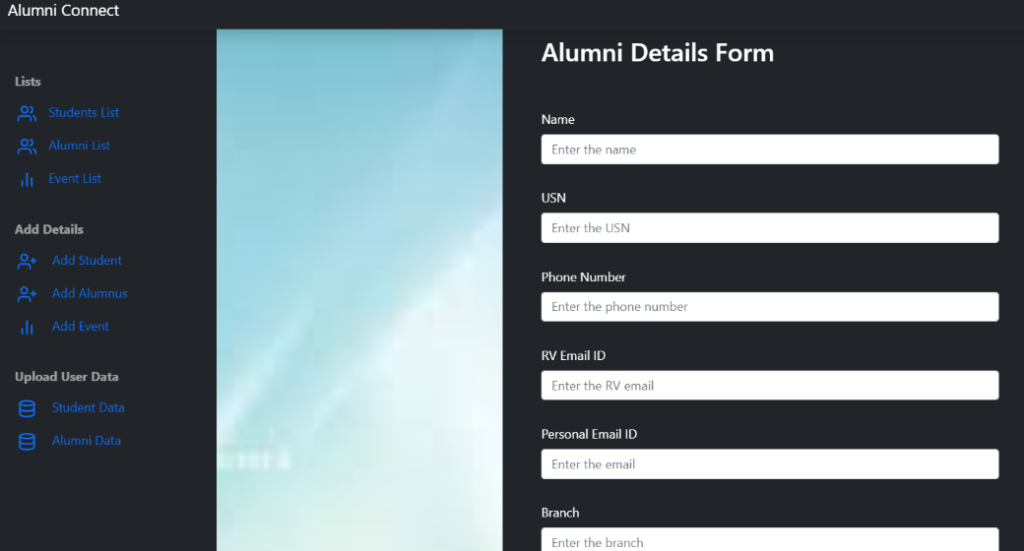
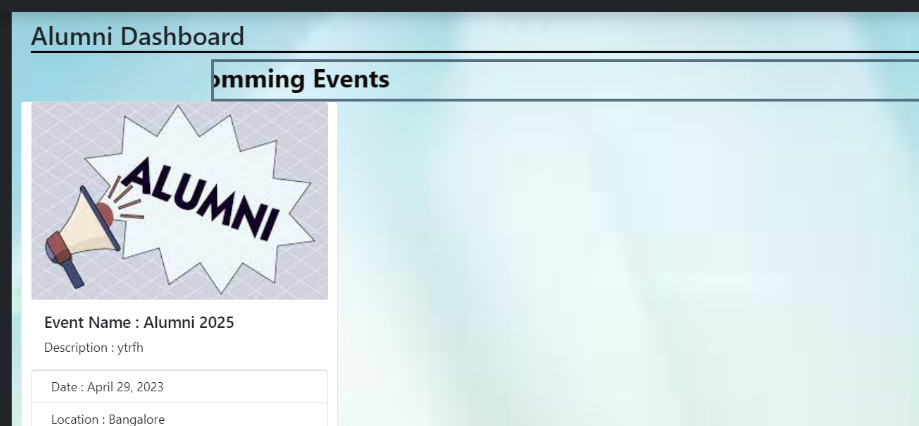
python manage.py runserverStep 5: Project Screenshots
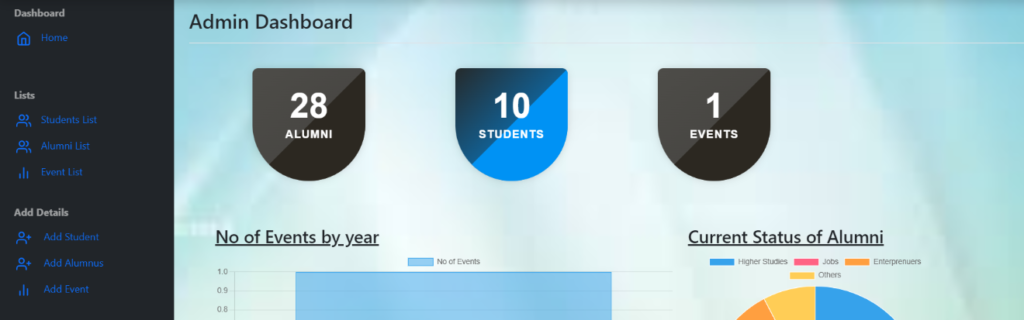
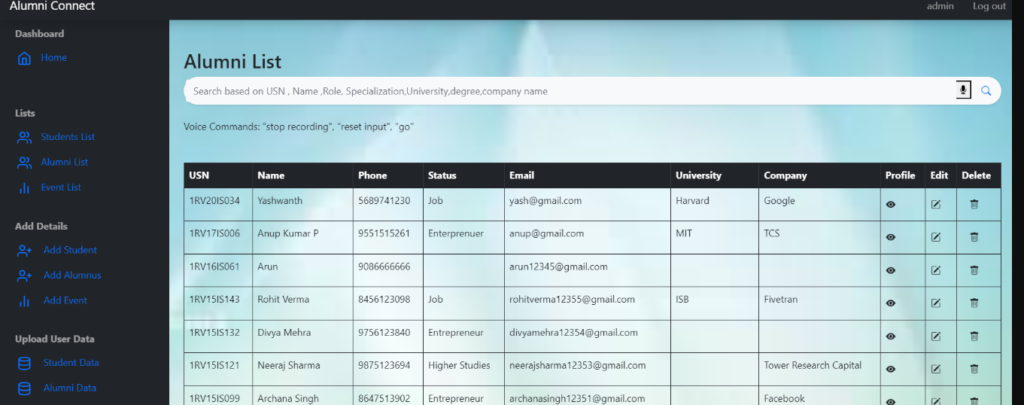
Here are some screenshots of the Alumni Connect web application:
- Admin Dashboard: Manage user profiles, upload CSVs, and create event posts.
- Alumni Interface: Alumni can update their status and create posts.
- Student Interface: Students can browse and search for alumni, and comment on posts.
Step 6: Download the Project
You can download the complete source code for Alumni Web Application here:
- Tags: Python, Alumni Management, Student Interaction, Admin Panel, Flask, Django, Web Application, CSV Upload, Python Project.
- SEO Keywords: Python Alumni Connect, Alumni Student Interaction System, Alumni Management System Python, Flask Web Application, Alumni Portal Django.
Alumni Web Application offers a structured and feature-rich platform for bringing alumni and students together. With dedicated roles for admins, alumni, and students, this application fosters a collaborative environment for networking and engagement. Follow this guide, download the source code, and start building your own Alumni Connect web application to strengthen connections within your institution!
alumni project
alumni management system using php and mysql github
alumni management system project documentation
alumni association projects
alumni management system dfd
alumni software open source
free alumni management software
college alumni portal project in jsp github


1 comment