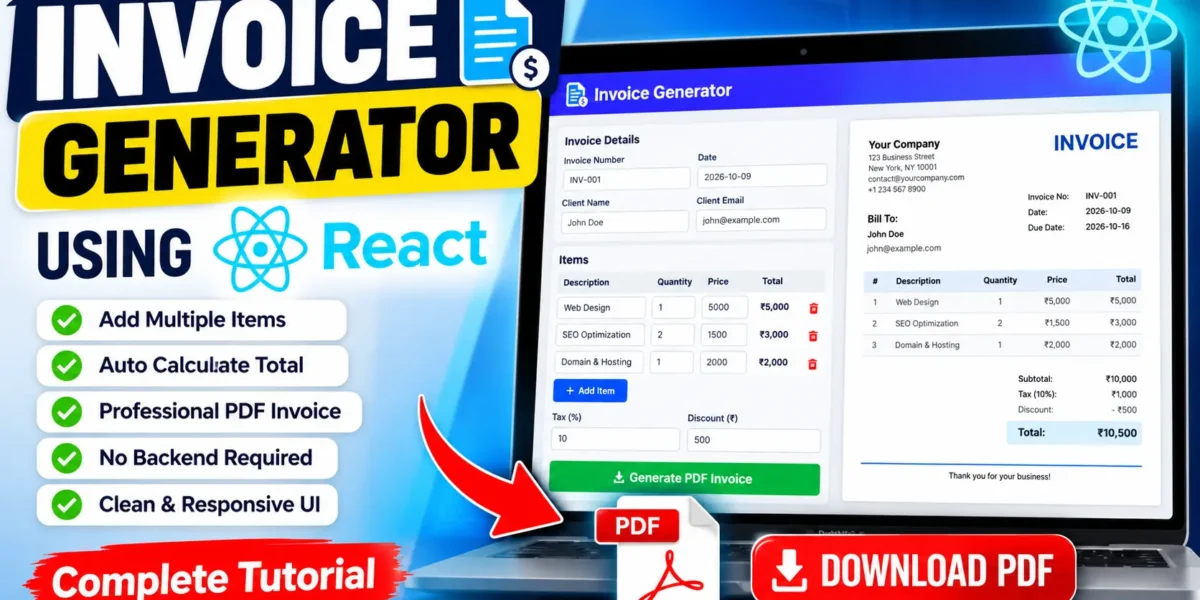
Invoice Generator Using React JS
Introduction
Creating invoices is an essential task for freelancers, startups, and small businesses. Preparing invoices repeatedly in Word or Excel can be time-consuming and inconvenient. An Invoice Generator using React JS provides a simple solution by allowing users to enter business details, add products or services, calculate totals, and download professional invoices as PDF files.
This project is useful for students learning React JS because it demonstrates component development, state management, form validation, dynamic item handling, and PDF generation. It runs in the browser without requiring a backend or database.
Table of Contents
Complete Advance AI Topics: Click Here
Real Time Projects on YouTube:- DecodeIT
Project Overview
| Project Detail | Information |
|---|---|
| Project Name | Invoice Generator |
| Language/s Used | JavaScript, HTML, CSS |
| Framework | React JS |
| Database | Not Required |
| Project Type | Frontend Web Application |
Key Features
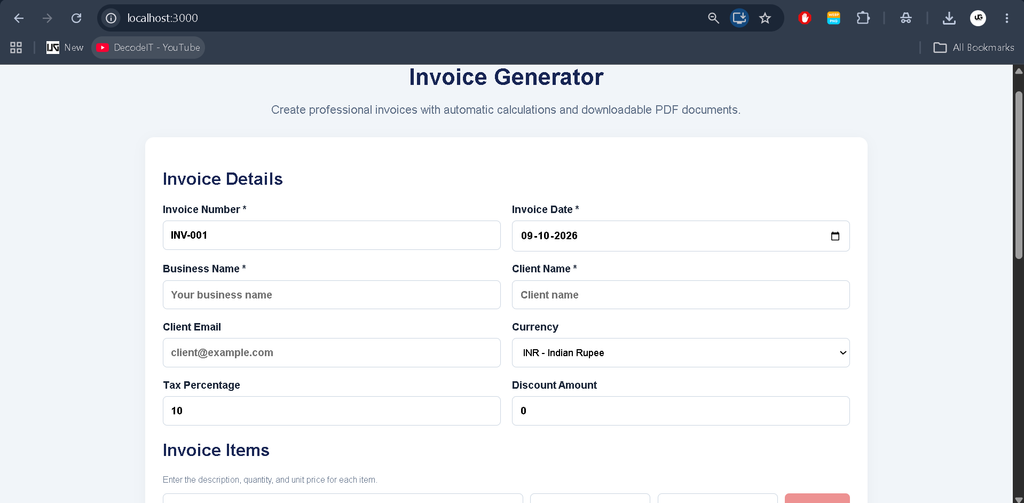
- Enter invoice number, date, and business details.
- Add and remove invoice items dynamically.
- Enter client name and email.
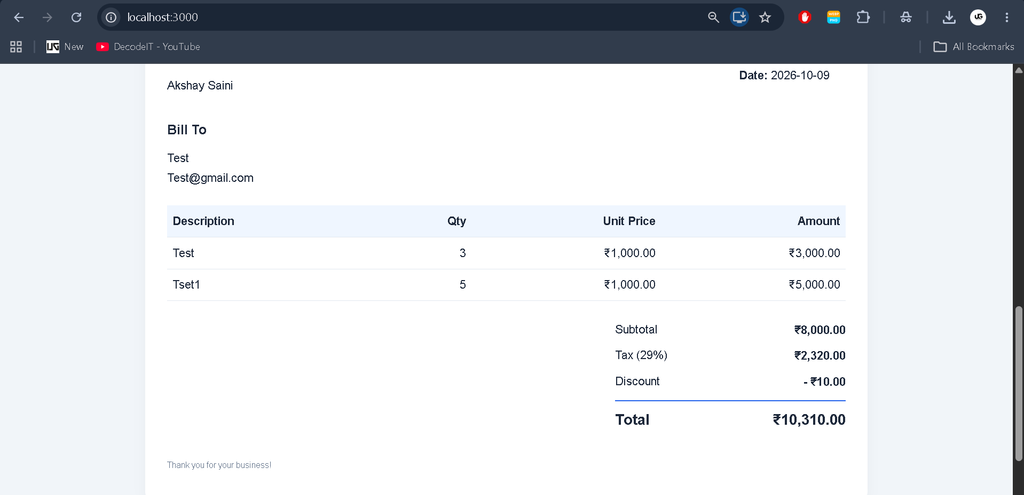
- Calculate item totals, subtotal, tax, and discount automatically.
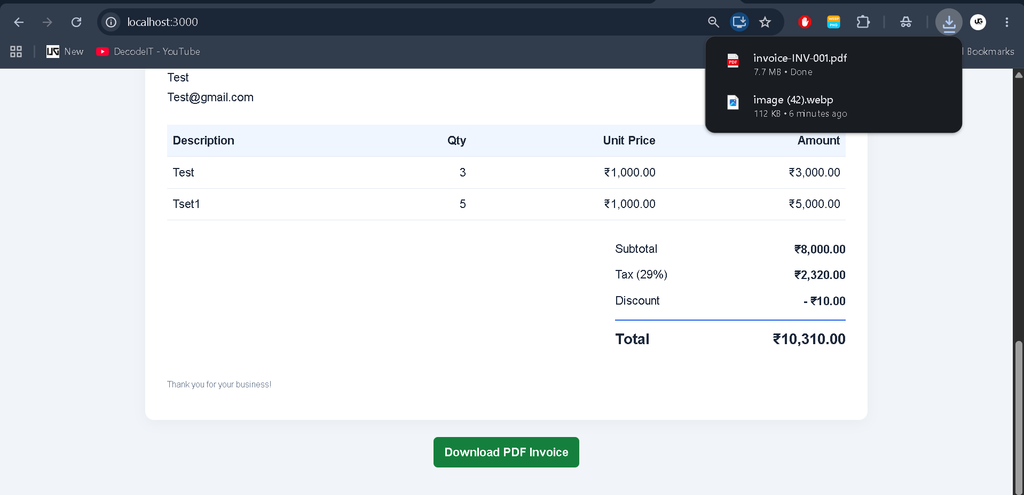
- Generate and download invoices in PDF format.
- Validate required invoice information.
- Display a live invoice preview.
- Use a responsive interface on desktop and mobile devices.
Technologies Used
React JS: Builds the interactive interface and manages invoice data.
JavaScript: Handles calculations, form events, and invoice generation.
CSS: Provides styling for the form, invoice preview, and responsive layout.
jsPDF: Generates downloadable PDF documents.
html2canvas: Converts the invoice preview into an image for PDF generation.
Installation Guide for VS Code
Step 1: Install Node.js
Install Node.js from its official website: https://nodejs.org/
Verify the installation using the VS Code terminal:
node -v
npm -v
Step 2: Create the React Project
npx create-react-app invoice-generator
cd invoice-generator
Step 3: Install Required Packages
npm install jspdf html2canvasStep 4: Replace the Application Files
Open the project in VS Code. Replace the contents of src/App.js and src/App.css with the complete code provided below.
Step 5: Run the Project
npm startOpen http://localhost:3000/ in your browser.
Screenshot
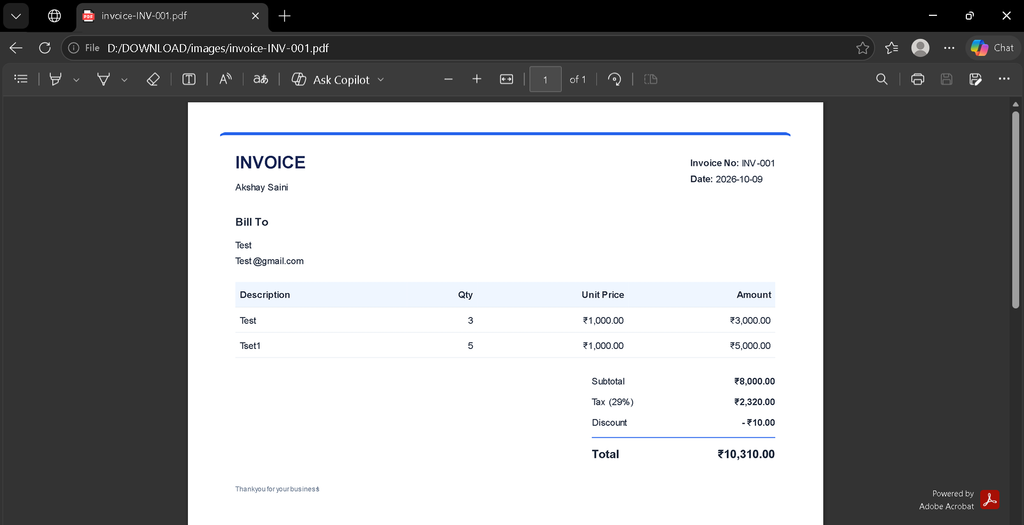
Complete Source Code
1. App.js
Replace the contents of src/App.js with the following code:
import React, { useState } from "react";
import jsPDF from "jspdf";
import html2canvas from "html2canvas";
import "./App.css";

export default function App() {
  const [invoice, setInvoice] = useState({
    number: "INV-001",
    date: new Date().toISOString().slice(0, 10),
    business: "",
    client: "",
    email: "",
    tax: 10,
    discount: 0,
    items: [{ description: "", quantity: 1, price: 0 }]
  });

  const update = (field, value) =>
    setInvoice(prev => ({ ...prev, [field]: value }));

  const updateItem = (index, field, value) => {
    setInvoice(prev => ({
      ...prev,
      items: prev.items.map((item, i) =>
        i === index ? { ...item, [field]: value } : item
      )
    }));
  };

  const addItem = () =>
    update("items", [
      ...invoice.items,
      { description: "", quantity: 1, price: 0 }
    ]);

  const removeItem = index => {
    if (invoice.items.length > 1) {
      update("items", invoice.items.filter((_, i) => i !== index));
    }
  };

  const subtotal = invoice.items.reduce(
    (sum, item) =>
      sum + Math.max(0, Number(item.quantity) || 0) *
      Math.max(0, Number(item.price) || 0),
    0
  );

  const tax = subtotal * Math.max(0, Number(invoice.tax) || 0) / 100;
  const discount = Math.min(
    subtotal + tax,
    Math.max(0, Number(invoice.discount) || 0)
  );
  const total = subtotal + tax - discount;

  const money = value =>
    new Intl.NumberFormat("en-IN", {
      style: "currency",
      currency: "INR"
    }).format(value);

  const generatePDF = async () => {
    if (
      !invoice.number.trim() ||
      !invoice.business.trim() ||
      !invoice.client.trim() ||
      !invoice.date ||
      invoice.items.some(item => !item.description.trim())
    ) {
      alert("Please complete all required invoice fields.");
      return;
    }

    const element = document.getElementById("invoice-preview");

    try {
      const canvas = await html2canvas(element, {
        scale: 2,
        backgroundColor: "#ffffff"
      });

      const pdf = new jsPDF("p", "mm", "a4");
      const width = 190;
      const height = canvas.height * width / canvas.width;
      const pageHeight = 277;
      let remaining = height;
      let position = 10;
      const image = canvas.toDataURL("image/png");

      pdf.addImage(image, "PNG", 10, position, width, height);
      remaining -= pageHeight;

      while (remaining > 0) {
        position = 10 - (height - remaining);
        pdf.addPage();
        pdf.addImage(image, "PNG", 10, position, width, height);
        remaining -= pageHeight;
      }

      pdf.save(`invoice-${invoice.number}.pdf`);
    } catch (error) {
      console.error(error);
      alert("Unable to generate PDF. Please try again.");
    }
  };

  return (
    <main className="app">
      <h1>Invoice Generator</h1>
      <p className="subtitle">
        Create professional invoices and download them as PDFs.
      </p>

      <section className="panel">
        <h2>Invoice Details</h2>

        <div className="form-grid">
          <label>Invoice Number
            <input value={invoice.number}
              onChange={e => update("number", e.target.value)} />
          </label>

          <label>Invoice Date
            <input type="date" value={invoice.date}
              onChange={e => update("date", e.target.value)} />
          </label>

          <label>Business Name
            <input value={invoice.business}
              onChange={e => update("business", e.target.value)}
              required />
          </label>

          <label>Client Name
            <input value={invoice.client}
              onChange={e => update("client", e.target.value)}
              required />
          </label>

          <label>Client Email
            <input type="email" value={invoice.email}
              onChange={e => update("email", e.target.value)} />
          </label>

          <label>Tax Percentage
            <input type="number" min="0" value={invoice.tax}
              onChange={e => update("tax", e.target.value)} />
          </label>

          <label>Discount Amount (₹)
            <input type="number" min="0" value={invoice.discount}
              onChange={e => update("discount", e.target.value)} />
          </label>
        </div>

        <h2>Invoice Items</h2>

        {invoice.items.map((item, index) => (
          <div className="item-row" key={index}>
            <input aria-label="Description" placeholder="Description"
              value={item.description}
              onChange={e =>
                updateItem(index, "description", e.target.value)} />

            <input aria-label="Quantity" type="number" min="1"
              value={item.quantity}
              onChange={e =>
                updateItem(index, "quantity", e.target.value)} />

            <input aria-label="Price" type="number" min="0"
              value={item.price}
              onChange={e =>
                updateItem(index, "price", e.target.value)} />

            <button type="button" className="remove"
              onClick={() => removeItem(index)}>
              Remove
            </button>
          </div>
        ))}

        <button type="button" onClick={addItem}>+ Add Item</button>
      </section>

      <section className="invoice" id="invoice-preview">
        <h2>INVOICE</h2>
        <p><strong>Business:</strong> {invoice.business || "Your Business"}</p>
        <p><strong>Invoice No:</strong> {invoice.number}</p>
        <p><strong>Date:</strong> {invoice.date}</p>
        <p><strong>Bill To:</strong> {invoice.client}</p>
        <p><strong>Email:</strong> {invoice.email}</p>

        <table>
          <thead>
            <tr>
              <th>Description</th>
              <th>Qty</th>
              <th>Price</th>
              <th>Amount</th>
            </tr>
          </thead>
          <tbody>
            {invoice.items.map((item, index) => (
              <tr key={index}>
                <td>{item.description || "Item"}</td>
                <td>{item.quantity}</td>
                <td>{money(Number(item.price) || 0)}</td>
                <td>{money(
                  (Number(item.quantity) || 0) *
                  (Number(item.price) || 0)
                )}</td>
              </tr>
            ))}
          </tbody>
        </table>

        <div className="totals">
          <p>Subtotal: {money(subtotal)}</p>
          <p>Tax: {money(tax)}</p>
          <p>Discount: {money(discount)}</p>
          <h3>Total: {money(total)}</h3>
        </div>
      </section>

      <button className="download" onClick={generatePDF}>
        Download PDF Invoice
      </button>
    </main>
  );
}
2. App.css
Replace the contents of src/App.css with the following styling:
* {
  box-sizing: border-box;
}

body {
  margin: 0;
  font-family: Arial, sans-serif;
  background: #f1f5f9;
  color: #1e293b;
}

.app {
  max-width: 1000px;
  margin: 30px auto;
  padding: 20px;
}

h1, h2 {
  color: #172554;
}

h1 {
  text-align: center;
}

.subtitle {
  text-align: center;
  color: #64748b;
}

.panel, .invoice {
  background: white;
  padding: 24px;
  margin: 22px 0;
  border-radius: 12px;
  box-shadow: 0 4px 16px #0000000a;
}

.form-grid {
  display: grid;
  grid-template-columns: repeat(2, minmax(0, 1fr));
  gap: 16px;
}

label {
  display: flex;
  flex-direction: column;
  gap: 7px;
  font-weight: 600;
}

input {
  width: 100%;
  min-width: 0;
  padding: 11px;
  border: 1px solid #cbd5e1;
  border-radius: 6px;
}

.item-row {
  display: grid;
  grid-template-columns: 3fr 1fr 1fr auto;
  gap: 10px;
  margin-bottom: 12px;
}

button {
  padding: 11px 16px;
  border: 0;
  border-radius: 6px;
  background: #2563eb;
  color: white;
  cursor: pointer;
  margin: 5px 5px 5px 0;
}

.remove {
  background: #dc2626;
}

.invoice {
  border-top: 5px solid #2563eb;
}

table {
  width: 100%;
  border-collapse: collapse;
  margin-top: 20px;
}

th, td {
  border-bottom: 1px solid #e2e8f0;
  padding: 12px 8px;
  text-align: left;
  overflow-wrap: anywhere;
}

th {
  background: #eff6ff;
}

.totals {
  text-align: right;
  margin-top: 20px;
}

.download {
  display: block;
  margin: 20px auto;
  background: #15803d;
  font-size: 16px;
}

@media (max-width: 600px) {
  .app {
    padding: 12px;
  }

  .form-grid {
    grid-template-columns: 1fr;
  }

  .item-row {
    grid-template-columns: 1fr 1fr;
  }

  .invoice, .panel {
    padding: 14px;
  }

  th, td {
    padding: 8px 4px;
    font-size: 12px;
  }
}
How to Use the Invoice Generator
- Start the application and open it in your browser.
- Enter the invoice number, date, business name, and client details.
- Add products or services with their quantities and prices.
- Enter the applicable tax percentage and discount amount.
- Review the invoice preview and verify the calculated total.
- Click Download PDF Invoice to save the generated document.
Project Benefits
This project helps students understand React state management, controlled inputs, array operations, automatic calculations, responsive CSS, and PDF generation. It can also serve as a starting point for a larger invoicing application with customer records, invoice history, payment tracking, and database integration.
Limitations
This version stores invoice information only in the current page state. It does not include user authentication, a database, cloud storage, or saved invoice history. The PDF is generated from an image of the invoice preview, so text may not be selectable, and long invoices may need additional pagination adjustments.
Final Thoughts
The Invoice Generator using React JS is a practical web development project that combines an interactive user interface with real-world business calculations. Students can use it to strengthen their React skills and build a useful portfolio project. With additional features such as database integration, invoice history, and authentication, it can be developed into a more complete invoicing system.
Keywords: Invoice Generator Using React JS, React Invoice Generator, Invoice Generator Source Code, React JS Project, PDF Invoice Generator, JavaScript Project,Invoice Generator,Invoice Generator Using React JS