
Tkinter LabelFrame
When designing GUI applications in Python using Tkinter, grouping related widgets together can enhance readability and organization. This is where the LabelFrame widget comes in handy. It allows developers to create a bordered container with a label, helping to visually separate different sections of the interface.
Unlike a regular Frame, a LabelFrame provides a title and acts as a well-structured container for elements like Radiobuttons, Checkbuttons, and Entry widgets.
Complete Advance AI topics:- CLICK HERE
SQL Tutorial :-Click Here
Syntax
To create a LabelFrame widget, use the following syntax:
w = LabelFrame(parent, options)
Here, parent represents the main window or a parent widget, and options are various configurable properties.
Tkinter LabelFrame Options
Below is a list of important options available for the LabelFrame widget:
| SN | Option | Description |
|---|---|---|
| 1 | bg | Sets the background color of the widget. |
| 2 | bd | Defines the size of the border. Default is 2 pixels. |
| 3 | Class | Default class value is LabelFrame. |
| 4 | colormap | Allows reusing the colormap of another window. |
| 5 | container | If set to True, the LabelFrame acts as a container. Default is False. |
| 6 | cursor | Changes the mouse pointer to a specific cursor type like arrow or dot. |
| 7 | fg | Sets the foreground (text) color. |
| 8 | font | Specifies the font style of the text. |
| 9 | height | Defines the height of the LabelFrame. |
| 10 | labelAnchor | Sets the position of the label text. Default is NW (north-west). |
| 11 | labelwidget | Uses another widget as a label instead of text. |
| 12 | highlightbackground | Sets the border color when the widget does not have focus. |
| 13 | highlightcolor | Sets the border color when the widget is in focus. |
| 14 | highlightthickness | Defines the width of the focus border. |
| 15 | padx | Adds horizontal padding inside the LabelFrame. |
| 16 | pady | Adds vertical padding inside the LabelFrame. |
| 17 | relief | Defines the border style (e.g., GROOVE, RAISED, SUNKEN). Default is GROOVE. |
| 18 | text | Sets the title of the LabelFrame. |
| 19 | width | Defines the width of the LabelFrame. |
Example: Using LabelFrame in Tkinter
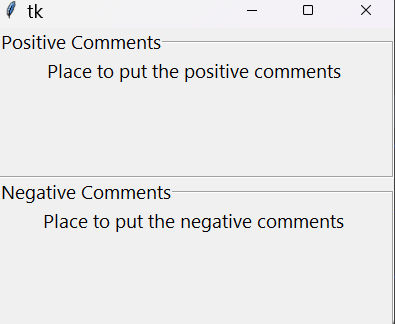
The following example demonstrates how to use LabelFrame to create a structured layout with Positive and Negative Comments sections.
# !/usr/bin/python3
from tkinter import *

top = Tk()
top.geometry("300x200")

labelframe1 = LabelFrame(top, text="Positive Comments")
labelframe1.pack(fill="both", expand="yes")

toplabel = Label(labelframe1, text="Place to put the positive comments")
toplabel.pack()

labelframe2 = LabelFrame(top, text="Negative Comments")
labelframe2.pack(fill="both", expand="yes")

bottomlabel = Label(labelframe2, text="Place to put the negative comments")
bottomlabel.pack()

top.mainloop()
Output:
This will generate a simple GUI with two labeled sections:
- One for Positive Comments
- One for Negative Comments
Each section contains a placeholder Label for adding text.
Machine Learning Tutorial:-Click Here
Conclusion
The Tkinter LabelFrame widget is a useful tool for grouping related elements within a GUI. It provides a border, label, and flexible styling options, making it ideal for organizing complex interfaces in a visually appealing way.
By using LabelFrame, developers can enhance the clarity of their applications, ensuring users can easily navigate different sections of the interface.
For more Tkinter tutorials and project ideas, stay connected with UpdateGadh!
tkinter labelframe github
tkinter labelframe grid
tkinter labelframe not showing
tkinter labelframe example
tkinter labelframe tutorial
tkinter frame
tkinter labelframe center text
tkinter labelframe width
🎓 Need Complete Final Year Project?
Get Source Code + Report + PPT + Viva Questions (Instant Access)
🛒 Visit UpdateGadh Store →